Proposed Agenda for IoT Workshop

On April 18, 2016 the ThingLabs Tinkerers will be hosting a full-day IoT Workshop at the DevIntersection conference (register with discount code SEVEN to save $50).I am looking for feedback on the proposed agenda. Here is the workshop abstract and the proposed agenda is below:

This is a hands-on workshop. You must bring your own Windows 10 laptop with Visual Studio 2015 Community (or higher edition) installed.

The Internet of Things (IoT) is the latest in an ever growing realm of technology that modern developers have to know about. To get into the IoT you have to learn about small form-factor and low-energy devices that interact with the physical world, and you have to know the Cloud services that will interface with these devices, for both data ingestion and command and control. In this full-day workshop you will learn both sides of the IoT. You will begin by diving into the world of Things by building applications that run on the Raspberry Pi 2, running Windows 10 IoT Core – a small form-factor variant of the popular Windows 10 family. Once you have mastered the world of Windows 10 IoT Core, you will learn how to connect the Thing you built to Azure IoT Hubs – a new Azure service designed to support millions of devices sending millions of messages. You will build a data ingestion pipeline, including visualizations of your IoT data that enable you to gain insight into your solution, and a command capability that enables you to control your device remotely. By the end of the workshop you will have built a complete Windows 10 and Azure IoT solution – and you may keep the hardware kit to continue your adventure in IoT.

Let me know what you think (we will publish this workshop on ThingLabs.io so that anyone can go through it as a self-directed workshop).

  • Goals
    • The goals of this workshop are:
      • Educate developers on the IoT stack offered by Microsoft
      • Educate developers on the Universal Windows Platform (UWP)
      • Educate developers on the Azure services related to IoT
    • By the end of the workshop a participant will be able to:
      • Build an IoT device using the Raspberry Pi 2 (RPi2)
      • Build a UWP app for Windows IoT Core to run on the RPi2
      • Use Windows IoT Core and the RPi2 to both capture input and present output
      • Create and configure an Azure IoT Hub
      • Connect their UWP application running on the RPi2 to Azure IoT Hubs
      • Build a data pipeline that captures data coming into IoT Hub and stores it
      • Build a visualization of IoT data
      • Build a client application that can send a command to the IoT device via Azure
  • Getting Started (pre-workshop if possible)
    • Development machine setup
    • Installation of Visual Studio
  • Lecture: Welcome to the Internet of Things
    • IoT Patterns for D2C and C2D
    • Maker Hardware Landscape
    • Prototyping Hardware
    • Lab: Hello, Windows IoT
  • Lecture: Input/Output
    • GPIO
    • Pulse Width Modulation
    • SPI and I2C
    • Lab: Nightlight
  • Lab: Not Quite the Nest – Smart Environment Monitor
  • Lunch
  • Lecture: Introduction to Azure Services for the IoT
    • Device-to-Cloud (D2C) Messaging
    • Lab: Sending Device-to-Cloud Messages
    • IoT Data Pipelines
    • Lab: Storing and Displaying IoT Data
    • Coud-to-Device (C2D) Messaging
    • Lab: Sending Cloud-to-Device Messages
  • Wrap Up

Post your comments – I’d love to hear what you think.

New ThingLabs IoT Workshop Kits

It felt a bit like Christmas on St. Patricks’s Day! That is because the first batch of the new ThingLabs IoT Workshop Kits arrived today. We will have four (4) new IoT Workshop Kit configurations, in addition to the two (this and this) that we already have. This will allow us to create workshops for a variety of hardware and operating-systems, including Linux, Windows 10 IoT Core and Real-Time Operating Systems (RTOS).

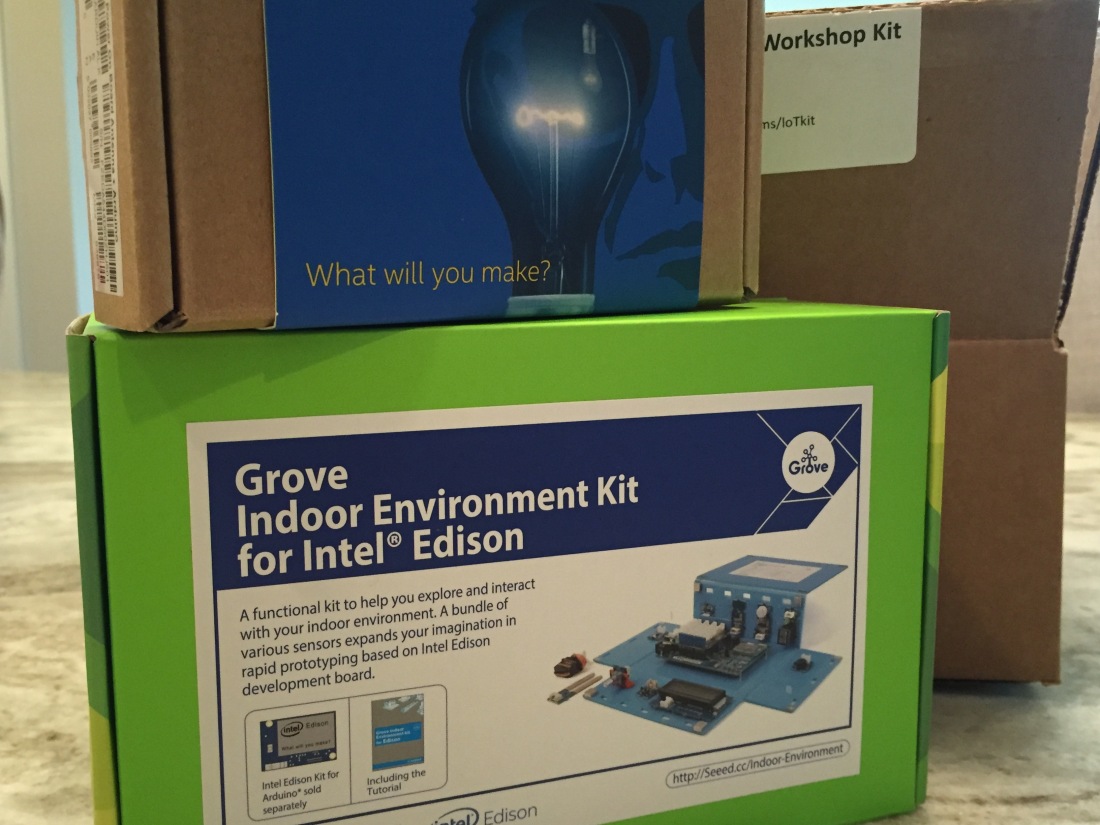
Today we received the Intel Edison and BeagleBone Green kits based on the Grove sensors.

IoTKits

The ThingLabs Tinkerers are busy working on new workshops for these kits and more (see below). We have a full-day workshop on April 18, 2016 at the Walt Disney World Swan for the DevIntersection conference (register with discount code SEVEN to save $50).


Here are all of the kits we are building new workshops for…


Linux-based Micro-Processor Kits

IoT Workshop Kit: Intel Edison Edition

(1) Intel® Edison for Arduino

(1) Grove Indoor Environment Kit for Intel® Edison

IMG_6311

IoT Workshop Kit: BeagleBone Green Edition

(1) SeeedStudio BeagleBone Green

(1) Grove Starter Kit for SeeedStudio BeagleBone Green

IMG_6313.JPG

Windows 10-based Micro-Processor Kits

IoT Workshop Kit: Raspberry Pi 2 Edition

(1) GrovePi+ Starter Kit for Raspberry Pi

(1) Raspberry Pi 2 Model B w/ ARMv7 Quad Core 1GB RAM

(1) USB Wi-Fi Adapter

(1) Power Supply

(1) microSD Card

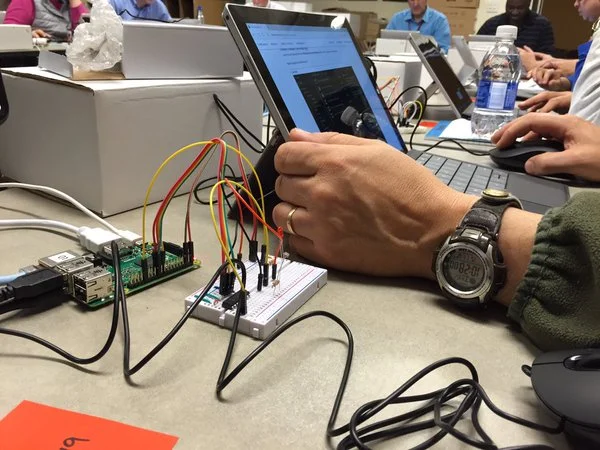
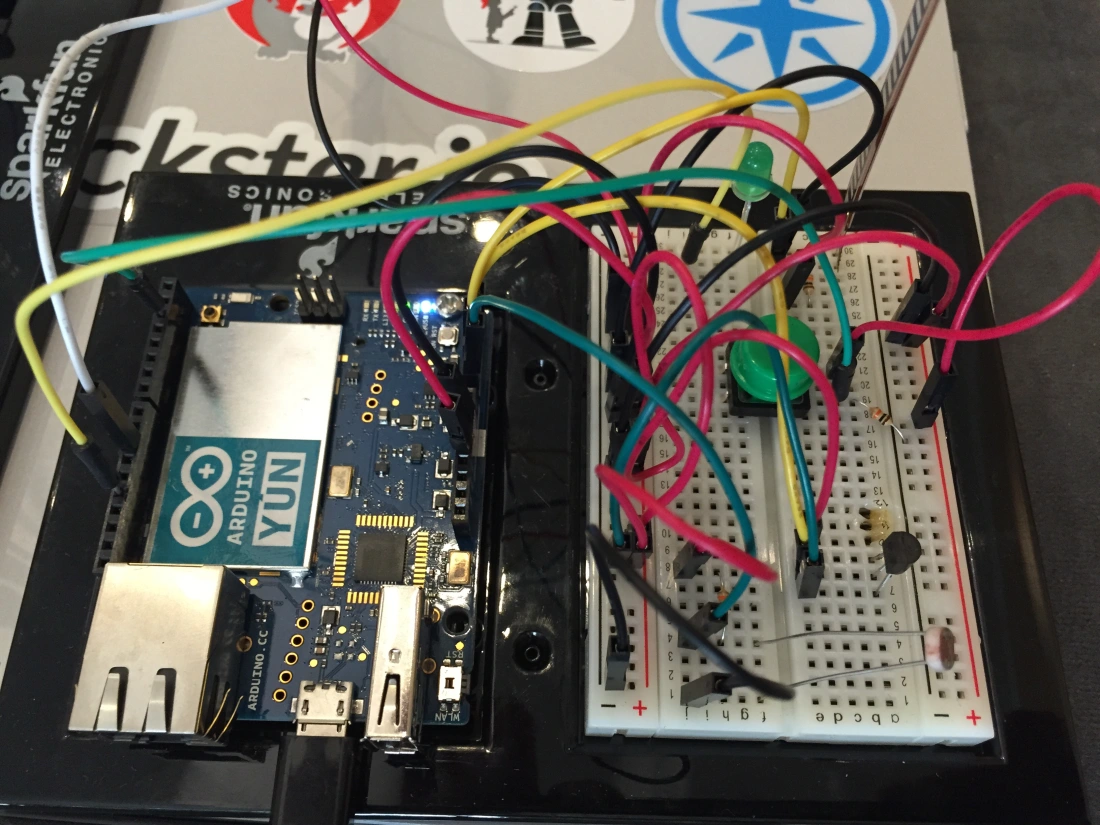
Check out the ‘Windows 10 IoT – Connected Nightlight Workshop‘ that uses a Raspberry Pi2 with a breadboard, LED and a photo-resistor instead of the GrovePi+ kit.

Micro-Controller Kits

IoT Workshop Kit: ESP8266 Edition

(1) Huzzah! Adafruit.io Internet of Things Feather ESP8266 – WiFi Starter Kit (soldered headers)

(1) USB to microUSB cable (6′)

(1) Breadboard

(10) Jumper Wires

IoT Workshop Kit: Arduino Uno Edition

(1) SparkFun RedBoard – Programmed with Arduino

(1) SparkFun Weather Shield w/ soldered headers

(1) SparkFun USB Mini-B Cable – 6 Foot

Checkout the ‘Node.js – Connected Weather Station‘ workshop for Arduino and Particle Photon

IoT Workshop Kit: Particle Photon Edition

(1) Particle Photon Kit

(1) SparkFun Photon Weather Shield

Checkout the ‘Node.js – Connected Weather Station‘ workshop for Arduino and Particle Photon


Talking About the Internet of Things

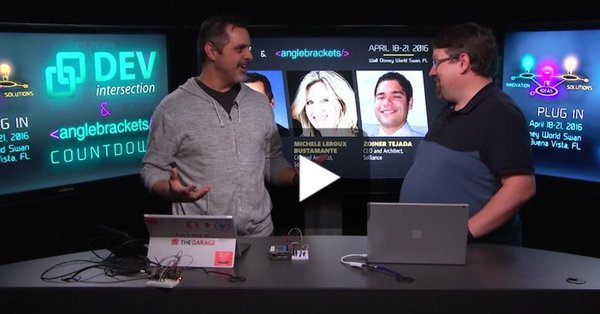
A few weeks ago I had the opportunity to spend a few minutes with my friend, Richard Campbell (of DotNetRocks) talking about the Internet of Things at the Channel 9 Studios. You can watch the video here (it is less than 10-minutes).

devInt_Show3

This show is part of a countdown show to DevIntersection2016 in Orlando, FL. My team and I will be running a ThingLabs IoT Workshop on Monday, April 18th (if you want to attend, register with discount code SEVEN to save $50 plus a Raspberry Pi 2 kit complete with lots of sensors, and some cool add-ons from the conference, such as a Microsoft Band 2, Surface 3 or XBox One depending on how many workshops you attend).

Here is the abstract:

This is a hands-on workshop. You must bring your own Windows 10 laptop with Visual Studio 2015 Community (or higher edition) installed.

The Internet of Things (IoT) is the latest in an ever growing realm of technology that modern developers have to know about. To get into the IoT you have to learn about small form-factor and low-energy devices that interact with the physical world, and you have to know the Cloud services that will interface with these devices, for both data ingestion and command and control. In this full-day workshop you will learn both sides of the IoT. You will begin by diving into the world of Things by building applications that run on the Raspberry Pi 2, running Windows 10 IoT Core – a small form-factor variant of the popular Windows 10 family. Once you have mastered the world of Windows 10 IoT Core, you will learn how to connect the Thing you built to Azure IoT Hubs – a new Azure service designed to support millions of devices sending millions of messages. You will build an data ingestion pipeline, including visualizations of your IoT data that enable you to gain insight into your solution, and a command capability that enables you to control your device remotely. By the end of the workshop you will have built a complete Windows and Azure IoT solution – and you may keep the hardware kit to continue your adventure in IoT.

The goals of this workshop are:

  • Educate developers on the IoT stack offerred by Microsoft
  • Educate developers on the Universal Windows Platform (UWP)
  • Educate developers on the Azure services related to IoT

By the end of the workshop a participant will be able to:

  • Build an IoT device using the Raspberry Pi 2 (RPi2)
  • Build a UWP app for Windows IoT Core to run on the RPi2
  • Use Windows IoT Core and the RPi2 to both capture input and present output
  • Create and configure an Azure IoT Hub
  • Connect their UWP application running on the RPi2 to Azure IoT Hubs
  • Build a data pipeline that captures data coming into IoT Hub and stores it
  • Build a visualization of IoT data
  • Build a client application that can send a command to the IoT device via Azure

See you in Florida!

Intel Edison, Node.js and Azure IoT

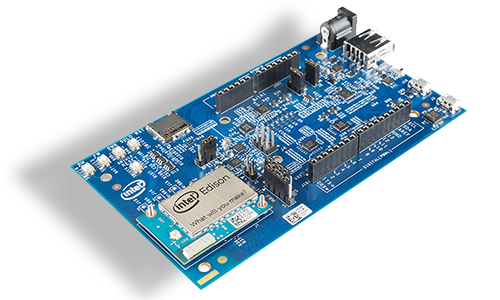
The Intel Edison is small, Wi-Fi and Bluetooth enabled development board running an Atom processor. It can be mounted on an Arduino-compatible board in order to interface with the wide variety of shields available.

iot_edison

I was interested in running Node.js and Johnny-Five – an open source framework originally created for robotics – on the Edison and connecting it to Azure IoT Hubs (Microsoft’s PaaS offering for the IoT).

Problem:

  • The Azure IoT SDK requires Node.js 0.12 or greater.
  • The Yocto project image (the officially supported Linux image for the Edison) only supports Node.js 0.10.
  • Updating Node.js on Yocto is a non-trivial task.

Thanks to some ideas and help from Rex St. John and Rick Waldron, I was able to accomplish this.

Install ubiLinux on the Edison

ubilinux is a Debian variant and allows installation onto the internal flash of an Intel Edison platform.
 Where the Yocto project is a custom configured Linux image that Intel has built to be lightweight, ubiLinux is a more full-featured Debian variant that, among other things, allows the installation of different versions of Node.js.

The installation instructions for ubiLinux are pretty straight forward.

ubilinux installation instructions for Intel® Edison

Using either PuTTy (Windows) or Terminal (Mac OS X), connect to the Edison setting the baud rate to 115200.

Example – Mac OS X w/ Terminal

screen /dev/cu.usbserial-######## 115200 -L

Replace ######## with the unique ID of your Edison (its easiest to type screen /dev/cu.usbs then press the tab key to auto-complete the device ID, then add 115200 -L to it.)

Press Enter twice and log in with the user name root and the password edison.

Once connected, set the time of on the OS to the current UTC time (you need to check and possibly set the time whenever the Edison is without power for any duration).

Check the current date in the terminal SSH session, by executing the following command:

date

If the date is incorrect, execute the following, replacing the date and time with the current UTC time.

date --s='23 FEB 2016 14:34:00'

Remember: You need to check (and possibly correct) the date any time the Edison has been without power.

Configure Wi-Fi

Use vi to edit the interfaces file (where the Wi-Fi connection information is maintained).

vi /etc/network/interfaces

Edit the following, changing Emutex and passphrase to your SSID and passcode respectively.

#auto wlan0
iface wlan0 inet dhcp
     # For WPA
     wpa-ssid Emutex
     wpa-psk passphrase

Restart the networking service with the following command:

/etc/init.d/networking restart

After networking is restarted, ensure the Wi-Fi is running.

ifup wlan0

You should see output similar to this (note the IP address in the bound to line)

root@ubilinux:~# ifup wlan0
Internet Systems Consortium DHCP Client 4.2.2
Copyright 2004-2011 Internet Systems Consortium.
All rights reserved.
For info, please visit https://www.isc.org/software/dhcp/
Listening on LPF/wlan0/90:b6:86:0b:53:2d
Sending on   LPF/wlan0/90:b6:86:0b:53:2d
Sending on   Socket/fallback
DHCPREQUEST on wlan0 to 255.255.255.255 port 67
DHCPDISCOVER on wlan0 to 255.255.255.255 port 67 interval 5
DHCPREQUEST on wlan0 to 255.255.255.255 port 67
DHCPOFFER from 192.168.1.1
DHCPACK from 192.168.1.1
bound to 192.168.1.54 -- renewal in 39220 seconds.
root@ubilinux:~# 

Update APT packages

From the same terminal session, enter the following command:

apt-get update

Install Node Version Manager

From the terminal session, clone the Node Version Manager (NVM) repo.

git clone git@github.com:creationix/nvm.git ~/.nvm && cd ~/.nvm && git checkout `git describe --abbrev=0 --tags`

Then activate NVM

. ~/.nvm/nvm.sh

Next, add these lines to your ~/.bashrc, ~/.profile, or ~/.zshrc file to have it automatically sourced upon login:

export NVM_DIR="$HOME/.nvm"
[ -s "$NVM_DIR/nvm.sh" ] && . "$NVM_DIR/nvm.sh" # This loads nvm

Install a Newer Version of Node.js

Use NVM to install whichever version of Node.js you prefer. For this example I am installing Node.js v4.3.1 (stable and mature), but you could install 0.12.7 or 5.0.0 or 5.6.0, or stable, etc..

From the terminal session, run the following command:

nvm install 4.3.1

This will install Node.js v4.3.1 and make it the current version (e.g. running node -v will tell you the current version).

Congratulations! The Edison is now set up with Node.js 4.3.1 and ready to run an app that leverages sensors and communicates with Azure IoT Hubs.

The IoT App

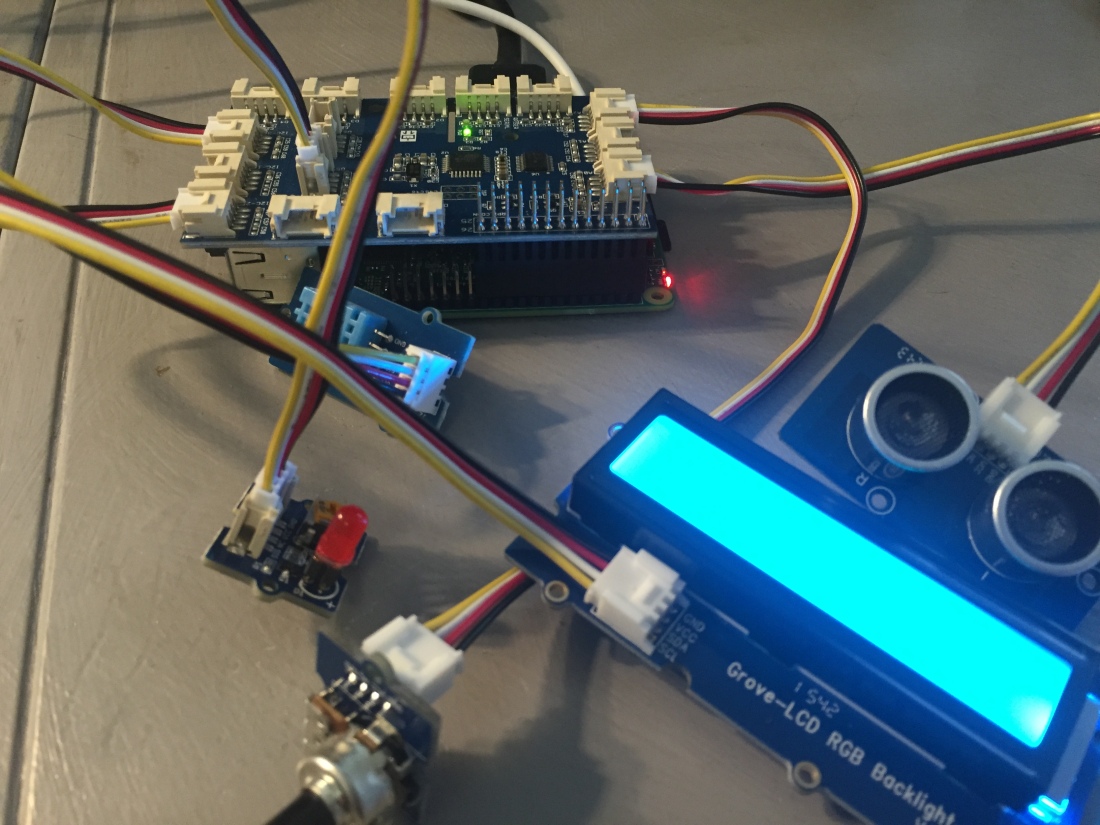
For this example I am using the Grove Stater Kit – Intel IoT Edition from  Seeed Studios, although you could use something else if you’d like. The advantage of prototyping/experimenting with the Grove kits is that they eliminate the error-prone wiring and breadboarding and make connecting a variety of sensors to digital, analog and I2C pins easy. The Grove kit includes an Arduino compatible shield that a wide variety of sensors plug into.

grove-intel

The app I built uses the Grove kit, but you can easily modify it to use sensors on a breadboard – so continue reading even if you don’t have the Grove kit.

I am also making the assumption that you have set-up and Azure IoT Hub (if you haven’t, check out this lab)

Johnny-Five

Johnny-Five is a framework I have been using a lot because of its nice abstraction of the GPIO complexities and exposes objects for the development board and sensors. The board and input sensors have events that invoke callback functions making it easy to work in an event-driven way.

Define the Application Dependencies

Start by defining the application manifest, including the dependencies. In your working directory on you PC, create a file called package.json.

{
    "name": "thinglabs-iot-sample",
    "repository": {
        "type": "git",
        "url": "https://github.com/ThingLabsIo/IoTLabs/tree/master/Edison/AzureIoT"
    },
    "version": "0.1.2",
    "private":true,
    "description": "Sample app that connects a device to Azure using Node.js",
    "main": "iot-starter-kit.js",
    "author": "Doug Seven",
    "license": "MIT",
    "dependencies": {
        "azure-iot-device": "1.0.1",
        "azure-iot-device-amqp": "1.0.1",
        "azure-iot-device-http": "1.0.1",
        "azure-iot-device-mqtt": "1.0.1",
        "johnny-five": "0.9.25",
        "edison-io": "0.9.2"
 }
}

Write the Application

There are a few key concepts to cover in the application, so I have commented it verbosely. Create a new file named iot-starter-kit.js (named after the Grove kit) and add the following:

'use strict';
// Define the objects you will be working with
var five = require("johnny-five");
var Edison = require("edison-io");
var device = require('azure-iot-device');

// Define the client object that communicates with Azure IoT Hubs
var Client = require('azure-iot-device').Client;
// Define the message object that will define the message
// format going into Azure IoT Hubs
var Message = require('azure-iot-device').Message;

// Define the protocol that will be used to send messages
// to Azure IoT Hub
// For this lab we will use AMQP over Web Sockets.
// If you want to use a different protocol, comment out
// the protocol you want to replace, 
// and uncomment one of the other transports.
// var Protocol = require('azure-iot-device-amqp-ws').AmqpWs;
var Protocol = require('azure-iot-device-amqp').Amqp;
// var Protocol = require('azure-iot-device-http').Http;
// var Protocol = require('azure-iot-device-mqtt').Mqtt;

// The device-specific connection string to your Azure IoT Hub
var connectionString = '[YOUR AZURE IOT DEVICE CONNECTION STRING]';

// Create the client instance that will manage the connection
// to your IoT Hub
// The client is created in the context of an Azure IoT device.
var client = Client.fromConnectionString(connectionString, Protocol);

// Extract the Azure IoT Hub device ID from the connection string
var deviceId = device.ConnectionString.parse(connectionString).DeviceId;

// location is simply a string that you can filter on later
var location = 'Home Office';

// Define the sensors you will use.
var thermometer, lcd, led;

// Define some variable for holding sensor values
// celsius, fahrenheit, red, green, blue
// and initialize them all to 0
var c, f, r, g, b = 0;

// Define the board, which is an abstraction of the Intel Edison
var board = new five.Board({
 io: new Edison()
});

// Open the connection to Azure IoT Hub
// When the connection respondes (either open or error)
// the anonymous function is executed
var connectCallback = function (err) {
  console.log("Azure IoT connection open...");
 
  if(err) {
    // If there is a connection error, show it
    console.err('Could not connect: ' + err.message);
  } else {
    console.log('Client connected');
 
    // Create a message and send it to the IoT Hub every five-seconds
    var sendInterval = setInterval(function () {
      sendMessage('temperature', c);
    }, 5000);
 
    client.on('message', function (msg) {
      console.log('Id: ' + msg.messageId + ' Body: ' + msg.data);
 
      var body = msg.data.split(":");
      var indexOfLed = body.indexOf("led");
 
      if(indexOfLed >= 0) {
        if(body[indexOfLed+1] === "on"){
          led.on();
        } else if(body[indexOfLed+1] === "off"){
          led.off();
        }
      }
 
      client.complete(msg, printResultFor('completed'));
      // reject and abandon follow the same pattern.
      // /!\ reject and abandon are not available with MQTT
    });
 
    // If the client gets an error, handle it
    client.on('error', function (err) {
      console.error(err.message);
    });
 
    // If the client gets disconnected, cleanup and reconnect
    client.on('disconnect', function () {
      clearInterval(sendInterval);
      client.removeAllListeners();
      client.connect(connectCallback);
    });
  }
}  

function sendMessage(src, val){
  // Define the message body
  var payload = JSON.stringify({
    deviceId: deviceId,
    location: location,
    sensorType: src,
    sensorValue: val
  });
 
  // Create the message based on the payload JSON
  var message = new Message(payload);
 
  // For debugging purposes, write out the message payload to the console
  console.log("Sending message: " + message.getData());
 
  // Send the message to Azure IoT Hub
  client.sendEvent(message, printResultFor('send'));
}
 
// Helper function to print results in the console
function printResultFor(op) {
  return function printResult(err, res) {
    if (err) console.log(op + ' error: ' + err.toString());
    if (res) console.log(op + ' status: ' + res.constructor.name);
  };
}

// Linear Interpolation
// https://en.wikipedia.org/wiki/Linear_interpolation
function linear(start, end, step, steps) {
  return (end - start) * step / steps + start;
}

// The board.on() executes the anonymous function when the 
// board reports back that it is initialized and ready.
board.on("ready", function() {
  console.log("Board connected...");
 
  client.open(connectCallback);
 
  // Plug the Temperature sensor module
  // into the Grove Shield's A0 jack
  thermometer = new five.Thermometer({
    pin: "A0",
    controller: "GROVE"
  });
 
  // Plug the LCD module into any of the
  // Grove Shield's I2C jacks.
  lcd = new five.LCD({
    controller: "JHD1313M1"
  });
 
  // Plug the LED module into the Grove Shield's D6 jack
  led = new five.Led(6);
 
  // The thermometer object will invoke a callback everytime it reads data
  // as fast as every 25ms or whatever the 'freq' argument is set to
  thermometer.on("data", function() {
    /* 
     * The LCD's background will change color according to the temperature.
     * Hot -> Warm: Red -> Yellow
     * Moderate: Green
     * Cool -> Cold: Blue -> Violet
     */
 
    // If there is no change in temp, do nothing.
    if (f === Math.round(this.fahrenheit)) {
      return;
    }
 
    f = Math.round(this.fahrenheit);
    c = Math.round(this.celsius);
 
    r = linear(0x00, 0xFF, f, 100);
    g = linear(0x00, 0x00, f, 100);
    b = linear(0xFF, 0x00, f, 100);
 
    lcd.bgColor(r, g, b).cursor(0, 0).print("Fahrenheit: " + f);
  });
});

Copy App Files to Edison

Using FileZilla you can connect to the Edison using sftp and drag-n-drop files onto the Edison.

  1. Launch FileZilla and connect to the Edison:
    Host: The IP address of the Edison
    Username: root
    Password: edison
    Port: 22
  2. Press Quickconnect
  3. Set the Local site path to the directory where your app files are located.
  4. Under the root directory on the Edison (Remote site), create a new directory named iot-labs.
  5. Drag the application files from the Local site directory to the Remote site directory.

Run the Application

From the terminal session, move to the iot-labs directory.

cd iot-labs

Use NPM to install the application dependencies.

npm install

Run the application

node iot-starter-kit.js

The application will launch and you will see some initial messages as the board initializes. After a few seconds you should see the temperature displayed on the LCD screen, and every five seconds you should see a messaged sent (‘enqueued’) to your Azure IoT hub.

root@ubilinux:~/iot-labs/azure-iot# node iot-starter-kit.js 
1456213504410 Device(s) Intel Edison 
1456213504440 Connected Intel Edison 
1456213504469 Repl Initialized 
>> Board connected...
Azure IoT connection open...
Client connected
Sending message: {"deviceId":"d7-edison","location":"Home Office","sensorType":"temperature","sensorValue":24}
send status: MessageEnqueued
Sending message: {"deviceId":"d7-edison","location":"Home Office","sensorType":"temperature","sensorValue":24}
send status: MessageEnqueued

You can monitor the messages coming into Azure IoT Hubs by using the iothub-explorer command line utility. In a new terminal window, install the iothub-explorer with NPM.

npm -g install iothub-explorer

Once installed, turn on the iothub-explorer event monitor (this will monitor messages as they come into your Azure IoT hub – so you know they are getting there).

iothub-explorer [YOUR IOT HUB OWNER CONNECTION STRING] monitor-events [YOUR DEVICE ID]

Note: On Mac OS X put the connection string in quotes. On Windows, do not use quotes).

You should see the same messages that your Edison is sending showing up in the monitor.

Event received: 
{ deviceId: 'd7-edison',
 location: 'Home Office',
 sensorType: 'temperature',
 sensorValue: 24 }

Sending Cloud to Device Messages

One of the capabilities I slipped into the application without much fanfare is the ability for the Edison to run an LED on and off based on messages sent to it via the Azure IoT hub. You can look at the application code for this block:

client.on('message', function (msg) {
  console.log('Id: ' + msg.messageId + ' Body: ' + msg.data);
 
  var body = msg.data.split(":");
  var indexOfLed = body.indexOf("led");
 
  if(indexOfLed >= 0) {
    if(body[indexOfLed+1] === "on"){
      led.on();
    } else if(body[indexOfLed+1] === "off"){
      led.off();
    }
  }
 
  client.complete(msg, printResultFor('completed'));
  // reject and abandon follow the same pattern.
  // /!\ reject and abandon are not available with MQTT
});

This block listens for incoming messages over AMQP and evaluates them for the sting led in the body of the message. If led is found, and the very next item in the body (split on a semicolon) is the word on or off, then the LED state is changed respectively (this is a simple/crude example of how to do this).

You can send messages to the Edison from the iothub-explorer with the following command:

iothub-explorer [YOUR IOT HUB OWNER CONNECTION STRING] send [YOUR DEVICE ID] led:on

Try it a few times using led:on and led:off as the message body.

There you have it. You can now use Node.js on the Intel Edison to send Device-to-Cloud messages and receive Cloud-to-Device messages (which can be command messages).
 

ThingLabs.io IoT Hands-on Workshop – April 18, 2016 – Florida

Register now for the ThingLabs.io Hands-on Workshop at DEVintersection in Orlando, Florida.

Use discount code SEVEN

April 18, 206 – Walt Disney World Swan Resort 

The Internet of Things (IoT) is the latest in an ever growing realm of technology that modern developers have to know about. To get into the IoT you have to learn about small form-factor and low-energy devices that interact with the physical world, and you have to know the Cloud services that will interface with these devices, for both data ingestion and command and control. In this full-day workshop you will learn both sides of the IoT. You will begin by diving into the world of Things by building applications that run on the Raspberry Pi 2, running Windows 10 IoT Core – a small form-factor variant of the popular Windows 10 family. Once you have mastered the wold of Windows 10 IoT Core, you will learn how to connect the Thing you built to Azure IoT Hubs – a new Azure service designed to support millions of devices sending millions of messages. You will build an data ingestion pipeline, including visualizations of your IoT data that enable you to gain insight into your solution, and a command capability that enables you to control your device remotely. By the end of the workshop you will have built a complete Windows and Azure IoT solution – and you may keep the hardware kit to continue your adventure in IoT.

This is a hands-on workshop. You must bring your own Windows 10 laptop with Visual Studio 2015 Community (or higher edition) installed.

Using Particle Photon with Johnny Five and VoodooSpark

I am elbow deep preparing an updated IoT workshop for three conferences in the next two months:

WeatherShieldFor these workshops I’ve decided to do something different – mostly driven by the fact that I gave away all 300 Arduino Yun kits I had (based on the SparkFun Inventors Kit) and one of my colleagues donated 180 Particle Photon development kits (and SparkFun Weather Shields) to me.

Particle already has some great getting started documentation and Paul DeCarlo already has a great tutorial on using the Weather Shield with Web Hooks on Hackster.io. I wanted to do something different to show how to build interesting IoT solutions, and leverage Microsoft Azure services where it makes sense.

I decided that my best angle is to build a series of labs that teach you how to use the Particle Photon with the Johnny Five framework (which we use in the existing Arduino labs on ThingLabs.io). The difference here is that, unlike the Arduino Yun which has a Linux distro onboard, the Photon has a small ARM M3 and a Broadcom Wi-Fi SOC – but no Linux distro. That means that unlike the Arduino labs I can’t build labs around creating Node.js apps that will eventually run in the onboard Linux environment (because there isn’t one).

Instead I looked around my house….WeMo. That is a great example of how the Photon works. Individual devices connected directly to a cloud service. SmartThings. Phillips Hue. Hmm. These are different. They use a hub-and-spoke model, with the hub acting as a field gateway between the spoke devices and the cloud service. The Photon is a Wi-Fi enabled board – why can’t it enable the spoke devices on my local Wi-Fi network and connect to a hub…perhaps a Raspberry Pi 2 or an Arduino Yun, which acts as the field gateway.

It turns out it can.PhotonRPi

I turned to the VoodooSpark firmware and the Particle-IO plugin for Johnny Five. VoodooSpark is open source firmware for the Particle Core and Photon that enables TCP communication with the device over a local Wi-Fi network instead of through the Particle Cloud. That means that with the VoodooSpark firmware you can build a local network with devices that you can communicate with. The way you accomplish that is with Johnny Five, an open source framework for hardware devices like Arduino, Raspberry Pi, Intel Edison and yes, the Particle Photon (enabled with the Particle-IO plugin).  With these bits of open source deliciousness I can configure the Photon to communicate over local Wi-Fi to whatever hub device I want, running a Node.js app. Right now that is my Windows 10 laptop, but soon it will be a Raspberry Pi 2 or an Arduino Yun (I haven’t decided yet). The hub device can communicate with multiple spoke devices (Photons or others) and act as the go-between to the Azure services. In the example shown here I simply configure two Johnny Five board objects based on a Particle object (or a Spark object as shown here – I am updating this to the Particle-IO code – Spark-IO is the old code from before Particle was Particle) that defines my Particle Cloud access token and the device ID (so the hub can call the service to get the Photon’s IP address).

2Photons

The labs currently use Nitrogen as the IoT device registry and pub-sub backend shim in front of Azure Event Hubs. The Nitrogen code to send a message from the Node app looks a bit like this:

        // Define the callback function for the photoresistor reading
        // The freq value used when the photoresistor was defined
        // determines how often this is invoked, thus controlling
        // the frequency of Nitrogen messages.
        photoresistor.on('data', function() {
            // Capture the ambient light level from the photoresistor
            var lightLevel = this.value;
            // Create a Nitrogen message
            var message = new nitrogen.Message({
                type: '_lightLevel',
                body: {
                    ambientLight: lightLevel
                }
            });
            
            // Log the light level value for debugging    
            session.log.info('Sending ambientLight: ' + lightLevel);
            // Send the message
            message.send(session);
        });

I am cranking away on the new labs – they will debut on ThingLabs.io around the same time as the TECHintersection conference in a couple weeks. This lab series will culminate (hopefully – I haven’t built this yet) in a smart home solution using a Raspberry Pi 2 as the hub and one or more Photons as spoke devices for things like ambient light and temperature, lighting control, open/close blinds, garage door monitoring, etc.

If you want to spy on me you can watch the code evolve here.

Another IoT Workshop Scheduled

If you saw this post you know that the last IoT Workshop my team and I hosted was a blast. We are getting ready to add some new labs to ThingLabs.io in preparation for another workshop event on Monday, September 14th. If you missed the last one, you should definitely come to this one – and it’s part of a great new event (disclaimer – I have been helping with the IoT content planning).

The new event is TECHintersection and it is being put together by the founders of DEVintersection, DotNetRocks, and one of the masterminds behind large scale events including Microsoft TechEd, //build and AWS re:Invent. The event has a shared focus on three topic areas that are tightly intertwined – the Internet of Things, Architecture and Security. Its looking like it is going to be a great few days spent in the city that gave birth to TED Talks – Monterey, CA.

For the IoT Workshop (we are calling this one IoT Firestarter) we are planning a full day, with lots of hands-on time. We will likely be using a new board, which will result in an entirely new set of labs. In this workshop we will go from building your first hardware project to ingesting telemetry into Azure and creating data visualizations with PowerBI (of course we will still do some command/control stuff – and maybe even bring a couple robots…who knows).

Throughout the conference there will be great sessions, including technical sessions from the Windows IoT and Azure IoT product teams, a few sessions from my team on how we have build IoT solutions in the real-world (including connected cars, constructions site and more), and a couple companies who have built IoT start-ups will be there to share their story, including Josh Supalla from Particle.io and a keynote by Adam Benzion, the co-founder of Hackster.io. You can get the full session list here.

I hope to see you there!

IoT Labs @ ThingLabs.io

Over the past few week my team and I have been working on a set of self-paced labs for building Internet connected Things using Arduino. Last night we got together with 150 of our closest DevIntersection/anglebrackets friends and had a great hack event. Lots of developers got their first exposure to Arduino and to building connected Things. For lots of people it was their first time build hardware instead of just software.

All of the labs are published at ThingLabs.io and lots more labs will be coming soon.

Thanks to all that attended last night – we had a blast.

image image image image