Why write all your code yourself?

Today I am at re:Invent 2022 in Las Vegas, NV. I am spending my days talking to AWS customers about Amazon CodeWhisperer – a new developer productivity service that will accelerate application development by providing automatic code recommendations based on the code and comments in your IDE.

For developers, Amazon CodeWhisperer is an IDE extension that runs while you are writing code, and provides code recommendations based on what you are doing. For example, imagine you are writing some Python code in JetBrains IntelliJ, and you want to parse addresses from a CSV file. You can write a comment describing what you want to accomplish and CodeWhisperer will recommend the code you need.

Parse Addresses from CSV and Validate Postal Code with RegEx in Python

CodeWhisperer is part of a new wave of generative AI that is being applied to the complexities of software development. Behind CodeWhisperer is an AI service backed by a large-language-model that can transform context and intent into code. CodeWhisperer can generate entire functions and logical code blocks without developers having to search for and customize code snippets from the web. This enables developers to stay focused and never leave the IDE to read documentation or search the web for examples.

CodeWhisperer can provide recommendations in JavaScript, TypeScript, C#, Java, and Python. For example, if you wanted to read and write from a file in C# you could do a quick search for it on the web to find some documentation that takes 5-minutes to read:

Of course, in under one-minute CodeWhisperer could do it for you:

Starting this week, the Amazon CodeWhisperer preview is open to anyone. In under 5-minutes you can use any email address to sign up for a AWS Builder ID, install the AWS Toolkit in your IDE, and get started using CodeWhisperer.

I can’t wait to hear what you think.

Setting Azure on FHIR

Let me start with the news…

Today I am please to announce the public preview of Azure API for FHIR® –  a new data service in the Microsoft Cloud for bringing together healthcare data from disparate systems and enabling new systems of engagement for patients, clinicians, and other healthcare professionals.

Now for the full story…

“Artificial intelligence represents one of technology’s most important priorities, and healthcare is perhaps AI’s most urgent application” – Satya Nadella, Microsoft CEO

Modern healthcare solutions face new challenges

Organizations building healthcare solutions face significant challenges as the data needed for modern solutions leveraging advanced analytics and machine learning can be difficult to access and is often segregated into different silos based on a variety of healthcare systems including electronic health records (EHR), financial/billing systems, customer relationship management (CRM) for marketing, picture archiving and communication systems (PACS) for imagery and more. To further complicate matters, evolving health data systems, including connected devices in the Internet of Medical Things (IoMT), genomics and immunomics systems, big data sets from government agencies and research institutions and more, make it difficult to get a complete view of a patient’s or population’s data. The desire is to bring all this data together to build modern healthcare solutions that can improve clinical, financial, operational, and population health analytics. The ability to digitally capture, annotate, and combine data to apply machine learning will transform the delivery of healthcare.

In order to successfully bring together the relevant data and apply machine learning, organizations require a platform that supports standards-based interoperability, the security and privacy needed when working with PHI, and the compute capability to process a large amount of data.

Health data interoperability is paramount

According to a paper published in JMIR Medical Informatics , limited health care data interoperability contributes to an estimated US $700 billion in wasteful spending annually in health care and leads to gaps in critical information at the point of care putting undue burden on patients and potentially leading to significant safety issues. As part of providing care for their patients, the typical primary care physician (PCP) coordinates care with 229 other physicians across 117 organizations, and an inpatient study found that 18% of medical errors leading to adverse drug events could be traced back to missing data in the patient’s medical record.

The healthcare industry has suffered from health data standards that are highly complex and often customized to a point that interoperability is too technically challenging for most. Interoperability based on previous standards has advanced only a little and has fallen far short of enabling the kind of interoperability required in today’s highly digitized world.

HL7 FHIR

icon-fhir-720The introduction of the Health Level Seven International (HL7®) Fast Healthcare Interoperability Resources (FHIR®) specification provides a better, more reliable interoperability path. The specification defines an ontology for health data that is durable across systems, including entities (known as Resources) for key concepts such as Patient, Provider, Payer, Encounter, Observation and more. Thirteen Resource definitions have been validated and are considered normative in the latest release of the specification (over 100 additional Resource definitions are at various stages of maturity). FHIR is widely perceived as key to the future of interoperable health data in the industry.

A Commitment to Interoperability

In August 2018, Microsoft was a key catalyst to bring together the biggest tech companies in a pledge for health data interoperability. Notably Microsoft, Google, IBM, Oracle and Salesforce announced their intent to jointly commit “to removing barriers for the adoption of technologies for healthcare interoperability, particularly those that are enabled through the cloud and AI.” Each of these companies has leveraged the FHIR specification in technology they provide, including Microsoft Teams Health Huddle , Dynamics 365 Healthcare Accelerator , and the Azure Security and Compliance Blueprint – HIPAA/HITRUST Health Data and AI from Microsoft. These companies made a commitment to supporting the FHIR specification to ensure health data interoperability across the clouds.

Announcing Azure API for FHIR

FIHR_largeMicrosoft is introducing a set of healthcare application programming interfaces (API) to enable modern healthcare solutions in the cloud. These APIs enable healthcare organizations to unlock the power of heath data so that systems can interoperate with each other and data can be used in new ways to drive better health outcomes more efficiently. Microsoft is adopting industry standard technical specifications like FHIR (Fast Healthcare Interoperability Resource ) to power this interoperability across multiple health systems and vendors. The first of our offerings, Azure API for FHIR, makes it easier for developers to leverage a single, consistent, secure, and authoritative ingestion and data management platform for extended health data and Protected Health Information (PHI) in the cloud, connecting multiple disparate systems. Azure API for FHIR will be followed by APIs for other health data standards like DICOM®, HL7v2 and more.

Enabling interoperability of health data

According to the paper published in JMIR Medical Informatics “despite the relatively rapid nationwide adoption of electronic health records (EHRs), the industry’s ability to successfully exchange computable health data has not kept pace. A recent study found that less than 35% of providers report data exchange with other providers within the same organization or affiliated hospitals. The exchange of data across organizations is even more limited, with less than 14% of providers reporting they exchange data with providers in other organizations or unaffiliated hospitals.” These systems have been developed using older standards, including HL7 v2.x, Clinical Document Architecture (CDA) and proprietary APIs that make it challenging for healthcare solution developers to leverage these systems across healthcare providers. This has significantly limited access to healthcare data across providers and made it far too difficult to gain insight that can be derived from analytics and machine learning.
Azure API for FHIR implements the HL7 FHIR specification, enabling interoperability based on an emerging industry standard data model and RESTful interface for health data. The cloud-based API supports SMART on FHIR integration with Azure Active Directory to enable 3rd party application developers to leverage existing application development.

FHIR heats up interoperability

FHIR is an evolving standard from HL7, with participation from major EHR vendors, provider and payer organizations, and technology companies. HL7 describes FHIR as follows:

The philosophy behind FHIR is to build a base set of resources that, either by themselves or when combined, satisfy the majority of common use cases. FHIR® resources aim to define the information contents and structure for the core information set that is shared by most implementations. There is a built-in extension mechanism to cover the remaining content as needed.

FHIR defines the ontology, data model and API for the exchange of health data between systems. The specification takes advantage of common paradigms and standards for cloud-based and Internet-enabled systems, such as JSON and XML to ensure human-readable content, and RESTful APIs to ensure universal access and interoperability. These are the same standards that the modern Web relies on for financial services, retail, and social media.

Key use cases for Azure API for FHIR

Azure API for FHIR is designed around three primary use cases – health system interoperability, research, and startup/innovation health projects. Across these use cases is a similar pattern – data from one or more systems-of-record coming together in a single persistence model through Azure API for FHIR and being enriched through analytics and machine learning. New systems-of-engagement interact with the data through the Azure API for FHIR.

A4F-UseCase

Managed for you, so you can focus on your business

Our team has been working on the Azure API for FHIR in an effort to bring to market a FHIR service that reduces the burden to developers and organizations building healthcare solutions. Along the way we released the FHIR Server for Azure – an open source project on GitHub. FHIR Server for Azure is essentially the same FHIR server code used in the Azure API for FHIR – the big difference is that we run it for you.

The open source project is great because you have access to all of the code, so if you want to make changes or access the data in Cosmos DB directly you can. However, if you want a turn-key FHIR server and you want our team to ensure it is up and running, maintained, and responsive to issues 24/7, then the Azure API for FHIR is what you are looking for.

Both offerings support the compliance requirements for protected health information (PHI):

  • FHIR Server for Azure runs on Azure services that are ISO 27001:2013 certified and Microsoft offers a Business Associates Agreement (BAA) for Covered Entities supporting HIPAA compliance, however you are responsible for ensuring compliance of the FHIR Server for Azure implementation and an application in your Azure subscription.
  • Azure API for FHIR is itself ISO 27001:2013 certified, and can be used in your healthcare solutions. When the service reaches the General Availability stage later this year, it will be covered by the Azure BAA, to support HIPAA compliance. This reduces your compliance overhead and enables you to leverage a managed FHIR server in your solutions.

cloud-models-fhir

But we’re not done yet

I am incredibly proud of our team for what we have accomplished so far by providing you options for using Azure for health data. You can run your own FHIR server with FHIR Server for Azure, or we can run it for you with Azure API for FHIR. 

We have a lot of ideas about how we will build out this service and the space around it. Fundamentally we recognize the following three things:

  1. You need to incorporate more than just FHIR data
  2. You need to give data scientists access to data for research
  3. You need to integrate medical imagery with FHIR resources

We have a roadmap that will ensure you are able to achieve these goals. Later this year you will see us expand the Azure healthcare APIs to include data adapters for other standards (e.g. HL7v2, CDA), add capabilities for connecting FHIR data to machine learning and artificial intelligence workloads (e.g. de-identification), and the integration of non-FHIR data, specifically medical imagery through the addition of an Azure API for DICOM.

Our team is looking forward to bring you more technology to help you create new healthcare solutions that enable new insights, better care, and increased efficiencies.

You can learn more about both FHIR Server for Azure and Azure API for FHIR in our documentation at https://docs.microsoft.com/en-us/azure/healthcare-apis/

HL7® FHIR® and the FHIR FLAME DESIGN are the registered trademark of HL7 and are used with the permission of HL7.

Introducing the Microsoft Connected Vehicle Platform

Last week at CES my team and I shared that we are collaborating with automakers – including the Renault-Nissan Alliance – to develop the Microsoft Connected Vehicle Platform (MCVP), a set of services built on the Microsoft Intelligent Cloud and designed to empower automakers to create custom connected driving experiences. This is not an in-car operating system or a “finished product;” it’s a living, agile platform that starts with the cloud as the foundation and aims to address five core themes that our partners have told us are key priorities: telematics and predictive maintenance, productivity and digital life, intelligent and contextual navigation, improved customer insight and engagement, and help building autonomous driving capabilities through deep learning and artificial intelligence.

The platform will serve as a reference for automakers who want to accelerate their investments in a connected car platform, and provide production-ready, globally scalable solutions that can be used as the foundation for creating differentiating experiences offered by automakers. We will build services that enable connected car platforms using Azure platform services (including our Azure IoT suite), Office 365, Skype, Bing, Dynamics, Cortana Intelligence Suite.

As we embark on building this platform, we are centered on three guiding principles:

  1. Microsoft is not building a car for production – we are partnering with automakers and suppliers to enable them to build the best connected and autonomous cars possible.
  2. Microsoft does not own the user experience – the user experience belongs to each automaker and should reflect their brand identity; we will build platform capabilities that enable automakers to create experiences their users love.
  3. Microsoft does not own the data – the data ingested into and created by the MCVP belongs to the automaker and/or their customers, not to Microsoft. We will build services that can create exceptional value when data from multiple data sources (OEMs, suppliers, etc.) are federated together and the OEM, suppliers and end users will always be able to control what data is shared into a federated service.

Telematics & Predictive Services

Telematics are the foundation of a connected vehicle platform, providing the context of the vehicle into the platform. We are developing a high-scale telematics platform based on Azure IoT Hub, that is configured specifically for the automotive industry. This includes high-scale telemetry ingestion using our device-to-cloud (D2C) capabilities (e.g. vehicle health snapshots at defined time or distance travelled intervals such as once-per-second or once-per-kilometer), remote control functions using our cloud-to-device (C2D) capabilities – both of which we will default to MQTT as our recommended protocol – and device management capabilities including an extension of our device twin capabilities to create a vehicle twin as a topography of multiple IoT devices, and support for over-the-air firmware and software updates leveraging OMA-Lightweight M2M and OMA-DM protocols.

As telemetry is brought into the MCVP it will be persisted in a telemetry store where it can be normalized and made available for value-added workflows including predictive maintenance. One of the initial predictive maintenance sample workflows we will build will focus on predicting the condition and life of electric vehicle (EV) batteries.

Productivity & Digital Life

Automakers are all looking for ways to improve the experience for people in cars, and to connect their experiences with people’s lives outside of their car, especially as cars become more autonomous and more of your “cycles” are available in the car to be used for non-driving activities. At CES – through partnerships with Nissan, BMW, Volvo, and others – we showcased some early work we are doing in this space, including integrating your Office 365 calendar into your can and connecting it to your navigation system so that your car knows where you are suppose to be, integrating Skype for Business to make conference calls from your car more seamless and less distracting, and Cortana in the car enabling a point of presence for your digital personal assistant while in your car. We believe that technologies like this will enable a wide variety of experiences that automakers will offer that will make your life more seamless between your home, car, office and out in the world.

We are working with the new Microsoft AI group to enable Cortana to understand the automotive context and have a point of presence in the head unit (infotainment unit) so that you can have Cortana available to you at ignition-on. A potential experience was shown in the Nissan keynote (you can watch the video here). Additionally Volvo announced the integration of Skype for Business in their 90-series vehicles, and a few months ago Daimler announced they are integrating Office 365 into some of their cars.

ADAS & Autonomous Driving

Microsoft has been investing in deep learning and artificial intelligence for years – we have an AI organization that is thousands strong and have some of the best performing neural networks in the world. We will leverage the power and capability of our AI organization to build support for automakers who are investing in autonomous driving capabilities – from automatic emergency braking, to lane keeping, to fully autonomous L5 driving. This starts with our deep learning toolkit. The Microsoft Cognitive Toolkit—previously known as CNTK—empowers you to harness the intelligence within massive datasets through deep learning by providing uncompromised scaling, speed and accuracy with commercial-grade quality and compatibility with the programming languages and algorithms you already use.

We will build deep learning assets for training ADAS and autonomous driving systems and enabling cars using these trained models to continuously get more intelligent with OTA updates of revised models based on retraining with newly acquired data collected through ADAS systems on the road. This creates a virtuous cycle of connected cars leveraging our deep learning and artificial intelligence capabilities and continuously improving by acting as data harvesters contributing to an continuous learning system.

Our goal is not to be a provider of autonomous driving systems, nor to (as our principles state) build an autonomous car, but rather to partner with the providers of in car sensors, sensor fusion and autonomous drive systems and improve their ability by leveraging the scale of our AI investments.

Intelligent & Contextual Navigation

In December we announced our extended partnership with HERE to be the base map provider for Bing Maps and to extend the use of their maps for automotive use. This not only enables the use of Bing Maps in the car, but also the use of Cortana for location based data (Cortana uses Bing Maps for local search). We also announced a strategic partnership with TomTom as the first (of multiple) map providers we will partner with to build a set of location based services in Azure. We also announced a continued partnership with Esri as a GIS provider that will compliment these services.

Our intent is to build a World Graph of devices and objects, their locations, and how they are interconnected. This is not only a high definition map of the entire world, but a constantly changing graph of relationships of things and their place and context in the world. The World Graph will enable new experiences both in and out of the car, and will be capable of provide connected cars with high definition maps for autonomous driving.

Where the deep learning systems we will use to create more intelligent ADAS and AD systems (the reactionary systems used in an autonomous car), the World Graph will provide the proactive contextual information about where a car is, where it is going and the rules of engagement between the two points. Our intent is to eventually achieve a level of capability where we can represent objects in the world to a 10cm accuracy or better, and reflect changes in the physical world in under one-minute. This will take time to achieve and will only be done through partnerships with automakers who will feed realtime data from cars into the World Graph and get valuable location based services out in return. These services include not only strategic maps and routing (routes from A to B) but also tactical details providing lane-level detail speed limits, hazard indications and more. As cars feed data into the service, they get more accurate data back out, effectively crowd sourcing information about the world.

Customer Insight & Engagement

One of the common themes we heard across the automotive industry is a need for better insight into their customers and better avenues for engagement. When you look at all of the data that is collected into the MCVP through telematics, productivity, and the World Graph you can see that this creates a big data opportunity. Throughout Microsoft we have significant investments in analytics and customer engagement that we can bring into the MCVP. Whether it is through our AzureML and Power BI tools or though Dynamics CRM and ERP offerings, we have software that can be leveraged to generate actionable intelligence for automakers and improve their ability to directly engage with their customers.

Some of our early investments are in analytics to support the R&D aspects of new car development and give automakers insight into their fleets of test and certification vehicles, reducing the time and complexity to understand how their fleets are performing in this critical phase. We are also investing in the development of cross-platform applications to give drivers, owners and users of vehicles real-time insight into their vehicle, from its current fuel level, tire pressure and battery level, to historical trends and predictive perspectives about how their vehicle has and will perform.

Summary

In the coming weeks I will dig into each area and provide more technical detail into what the Microsoft Connected Vehicle Platform will provide to our automaker partners. Until then you are invited to read this white paper and look at this infographic.

Proposed Agenda for IoT Workshop

On April 18, 2016 the ThingLabs Tinkerers will be hosting a full-day IoT Workshop at the DevIntersection conference (register with discount code SEVEN to save $50).I am looking for feedback on the proposed agenda. Here is the workshop abstract and the proposed agenda is below:

This is a hands-on workshop. You must bring your own Windows 10 laptop with Visual Studio 2015 Community (or higher edition) installed.

The Internet of Things (IoT) is the latest in an ever growing realm of technology that modern developers have to know about. To get into the IoT you have to learn about small form-factor and low-energy devices that interact with the physical world, and you have to know the Cloud services that will interface with these devices, for both data ingestion and command and control. In this full-day workshop you will learn both sides of the IoT. You will begin by diving into the world of Things by building applications that run on the Raspberry Pi 2, running Windows 10 IoT Core – a small form-factor variant of the popular Windows 10 family. Once you have mastered the world of Windows 10 IoT Core, you will learn how to connect the Thing you built to Azure IoT Hubs – a new Azure service designed to support millions of devices sending millions of messages. You will build a data ingestion pipeline, including visualizations of your IoT data that enable you to gain insight into your solution, and a command capability that enables you to control your device remotely. By the end of the workshop you will have built a complete Windows 10 and Azure IoT solution – and you may keep the hardware kit to continue your adventure in IoT.

Let me know what you think (we will publish this workshop on ThingLabs.io so that anyone can go through it as a self-directed workshop).

  • Goals
    • The goals of this workshop are:
      • Educate developers on the IoT stack offered by Microsoft
      • Educate developers on the Universal Windows Platform (UWP)
      • Educate developers on the Azure services related to IoT
    • By the end of the workshop a participant will be able to:
      • Build an IoT device using the Raspberry Pi 2 (RPi2)
      • Build a UWP app for Windows IoT Core to run on the RPi2
      • Use Windows IoT Core and the RPi2 to both capture input and present output
      • Create and configure an Azure IoT Hub
      • Connect their UWP application running on the RPi2 to Azure IoT Hubs
      • Build a data pipeline that captures data coming into IoT Hub and stores it
      • Build a visualization of IoT data
      • Build a client application that can send a command to the IoT device via Azure
  • Getting Started (pre-workshop if possible)
    • Development machine setup
    • Installation of Visual Studio
  • Lecture: Welcome to the Internet of Things
    • IoT Patterns for D2C and C2D
    • Maker Hardware Landscape
    • Prototyping Hardware
    • Lab: Hello, Windows IoT
  • Lecture: Input/Output
    • GPIO
    • Pulse Width Modulation
    • SPI and I2C
    • Lab: Nightlight
  • Lab: Not Quite the Nest – Smart Environment Monitor
  • Lunch
  • Lecture: Introduction to Azure Services for the IoT
    • Device-to-Cloud (D2C) Messaging
    • Lab: Sending Device-to-Cloud Messages
    • IoT Data Pipelines
    • Lab: Storing and Displaying IoT Data
    • Coud-to-Device (C2D) Messaging
    • Lab: Sending Cloud-to-Device Messages
  • Wrap Up

Post your comments – I’d love to hear what you think.

New ThingLabs IoT Workshop Kits

It felt a bit like Christmas on St. Patricks’s Day! That is because the first batch of the new ThingLabs IoT Workshop Kits arrived today. We will have four (4) new IoT Workshop Kit configurations, in addition to the two (this and this) that we already have. This will allow us to create workshops for a variety of hardware and operating-systems, including Linux, Windows 10 IoT Core and Real-Time Operating Systems (RTOS).

Today we received the Intel Edison and BeagleBone Green kits based on the Grove sensors.

IoTKits

The ThingLabs Tinkerers are busy working on new workshops for these kits and more (see below). We have a full-day workshop on April 18, 2016 at the Walt Disney World Swan for the DevIntersection conference (register with discount code SEVEN to save $50).


Here are all of the kits we are building new workshops for…


Linux-based Micro-Processor Kits

IoT Workshop Kit: Intel Edison Edition

(1) Intel® Edison for Arduino

(1) Grove Indoor Environment Kit for Intel® Edison

IMG_6311

IoT Workshop Kit: BeagleBone Green Edition

(1) SeeedStudio BeagleBone Green

(1) Grove Starter Kit for SeeedStudio BeagleBone Green

IMG_6313.JPG

Windows 10-based Micro-Processor Kits

IoT Workshop Kit: Raspberry Pi 2 Edition

(1) GrovePi+ Starter Kit for Raspberry Pi

(1) Raspberry Pi 2 Model B w/ ARMv7 Quad Core 1GB RAM

(1) USB Wi-Fi Adapter

(1) Power Supply

(1) microSD Card

Check out the ‘Windows 10 IoT – Connected Nightlight Workshop‘ that uses a Raspberry Pi2 with a breadboard, LED and a photo-resistor instead of the GrovePi+ kit.

Micro-Controller Kits

IoT Workshop Kit: ESP8266 Edition

(1) Huzzah! Adafruit.io Internet of Things Feather ESP8266 – WiFi Starter Kit (soldered headers)

(1) USB to microUSB cable (6′)

(1) Breadboard

(10) Jumper Wires

IoT Workshop Kit: Arduino Uno Edition

(1) SparkFun RedBoard – Programmed with Arduino

(1) SparkFun Weather Shield w/ soldered headers

(1) SparkFun USB Mini-B Cable – 6 Foot

Checkout the ‘Node.js – Connected Weather Station‘ workshop for Arduino and Particle Photon

IoT Workshop Kit: Particle Photon Edition

(1) Particle Photon Kit

(1) SparkFun Photon Weather Shield

Checkout the ‘Node.js – Connected Weather Station‘ workshop for Arduino and Particle Photon


Talking About the Internet of Things

A few weeks ago I had the opportunity to spend a few minutes with my friend, Richard Campbell (of DotNetRocks) talking about the Internet of Things at the Channel 9 Studios. You can watch the video here (it is less than 10-minutes).

devInt_Show3

This show is part of a countdown show to DevIntersection2016 in Orlando, FL. My team and I will be running a ThingLabs IoT Workshop on Monday, April 18th (if you want to attend, register with discount code SEVEN to save $50 plus a Raspberry Pi 2 kit complete with lots of sensors, and some cool add-ons from the conference, such as a Microsoft Band 2, Surface 3 or XBox One depending on how many workshops you attend).

Here is the abstract:

This is a hands-on workshop. You must bring your own Windows 10 laptop with Visual Studio 2015 Community (or higher edition) installed.

The Internet of Things (IoT) is the latest in an ever growing realm of technology that modern developers have to know about. To get into the IoT you have to learn about small form-factor and low-energy devices that interact with the physical world, and you have to know the Cloud services that will interface with these devices, for both data ingestion and command and control. In this full-day workshop you will learn both sides of the IoT. You will begin by diving into the world of Things by building applications that run on the Raspberry Pi 2, running Windows 10 IoT Core – a small form-factor variant of the popular Windows 10 family. Once you have mastered the world of Windows 10 IoT Core, you will learn how to connect the Thing you built to Azure IoT Hubs – a new Azure service designed to support millions of devices sending millions of messages. You will build an data ingestion pipeline, including visualizations of your IoT data that enable you to gain insight into your solution, and a command capability that enables you to control your device remotely. By the end of the workshop you will have built a complete Windows and Azure IoT solution – and you may keep the hardware kit to continue your adventure in IoT.

The goals of this workshop are:

  • Educate developers on the IoT stack offerred by Microsoft
  • Educate developers on the Universal Windows Platform (UWP)
  • Educate developers on the Azure services related to IoT

By the end of the workshop a participant will be able to:

  • Build an IoT device using the Raspberry Pi 2 (RPi2)
  • Build a UWP app for Windows IoT Core to run on the RPi2
  • Use Windows IoT Core and the RPi2 to both capture input and present output
  • Create and configure an Azure IoT Hub
  • Connect their UWP application running on the RPi2 to Azure IoT Hubs
  • Build a data pipeline that captures data coming into IoT Hub and stores it
  • Build a visualization of IoT data
  • Build a client application that can send a command to the IoT device via Azure

See you in Florida!

Intel Edison, Node.js and Azure IoT

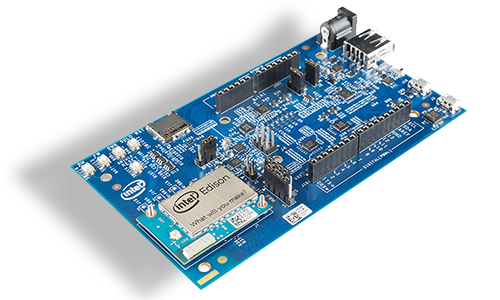
The Intel Edison is small, Wi-Fi and Bluetooth enabled development board running an Atom processor. It can be mounted on an Arduino-compatible board in order to interface with the wide variety of shields available.

iot_edison

I was interested in running Node.js and Johnny-Five – an open source framework originally created for robotics – on the Edison and connecting it to Azure IoT Hubs (Microsoft’s PaaS offering for the IoT).

Problem:

  • The Azure IoT SDK requires Node.js 0.12 or greater.
  • The Yocto project image (the officially supported Linux image for the Edison) only supports Node.js 0.10.
  • Updating Node.js on Yocto is a non-trivial task.

Thanks to some ideas and help from Rex St. John and Rick Waldron, I was able to accomplish this.

Install ubiLinux on the Edison

ubilinux is a Debian variant and allows installation onto the internal flash of an Intel Edison platform.
 Where the Yocto project is a custom configured Linux image that Intel has built to be lightweight, ubiLinux is a more full-featured Debian variant that, among other things, allows the installation of different versions of Node.js.

The installation instructions for ubiLinux are pretty straight forward.

ubilinux installation instructions for Intel® Edison

Using either PuTTy (Windows) or Terminal (Mac OS X), connect to the Edison setting the baud rate to 115200.

Example – Mac OS X w/ Terminal

screen /dev/cu.usbserial-######## 115200 -L

Replace ######## with the unique ID of your Edison (its easiest to type screen /dev/cu.usbs then press the tab key to auto-complete the device ID, then add 115200 -L to it.)

Press Enter twice and log in with the user name root and the password edison.

Once connected, set the time of on the OS to the current UTC time (you need to check and possibly set the time whenever the Edison is without power for any duration).

Check the current date in the terminal SSH session, by executing the following command:

date

If the date is incorrect, execute the following, replacing the date and time with the current UTC time.

date --s='23 FEB 2016 14:34:00'

Remember: You need to check (and possibly correct) the date any time the Edison has been without power.

Configure Wi-Fi

Use vi to edit the interfaces file (where the Wi-Fi connection information is maintained).

vi /etc/network/interfaces

Edit the following, changing Emutex and passphrase to your SSID and passcode respectively.

#auto wlan0
iface wlan0 inet dhcp
     # For WPA
     wpa-ssid Emutex
     wpa-psk passphrase

Restart the networking service with the following command:

/etc/init.d/networking restart

After networking is restarted, ensure the Wi-Fi is running.

ifup wlan0

You should see output similar to this (note the IP address in the bound to line)

root@ubilinux:~# ifup wlan0
Internet Systems Consortium DHCP Client 4.2.2
Copyright 2004-2011 Internet Systems Consortium.
All rights reserved.
For info, please visit https://www.isc.org/software/dhcp/
Listening on LPF/wlan0/90:b6:86:0b:53:2d
Sending on   LPF/wlan0/90:b6:86:0b:53:2d
Sending on   Socket/fallback
DHCPREQUEST on wlan0 to 255.255.255.255 port 67
DHCPDISCOVER on wlan0 to 255.255.255.255 port 67 interval 5
DHCPREQUEST on wlan0 to 255.255.255.255 port 67
DHCPOFFER from 192.168.1.1
DHCPACK from 192.168.1.1
bound to 192.168.1.54 -- renewal in 39220 seconds.
root@ubilinux:~# 

Update APT packages

From the same terminal session, enter the following command:

apt-get update

Install Node Version Manager

From the terminal session, clone the Node Version Manager (NVM) repo.

git clone git@github.com:creationix/nvm.git ~/.nvm && cd ~/.nvm && git checkout `git describe --abbrev=0 --tags`

Then activate NVM

. ~/.nvm/nvm.sh

Next, add these lines to your ~/.bashrc, ~/.profile, or ~/.zshrc file to have it automatically sourced upon login:

export NVM_DIR="$HOME/.nvm"
[ -s "$NVM_DIR/nvm.sh" ] && . "$NVM_DIR/nvm.sh" # This loads nvm

Install a Newer Version of Node.js

Use NVM to install whichever version of Node.js you prefer. For this example I am installing Node.js v4.3.1 (stable and mature), but you could install 0.12.7 or 5.0.0 or 5.6.0, or stable, etc..

From the terminal session, run the following command:

nvm install 4.3.1

This will install Node.js v4.3.1 and make it the current version (e.g. running node -v will tell you the current version).

Congratulations! The Edison is now set up with Node.js 4.3.1 and ready to run an app that leverages sensors and communicates with Azure IoT Hubs.

The IoT App

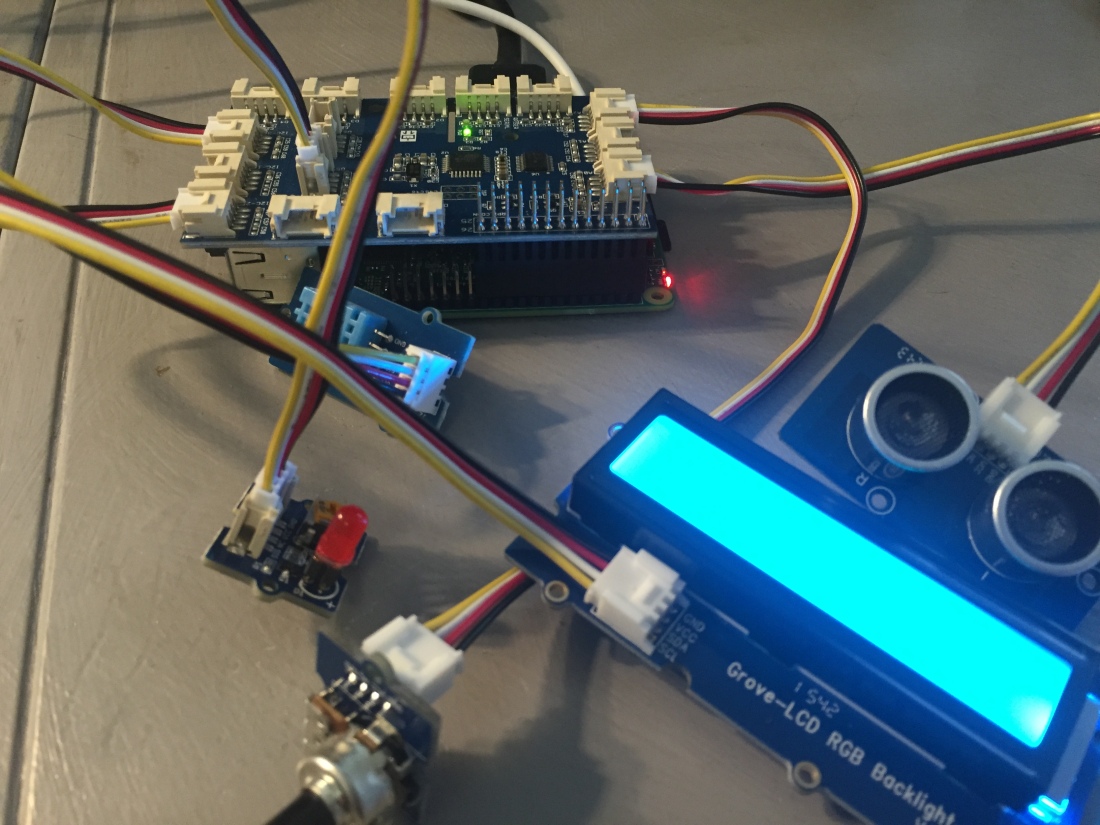
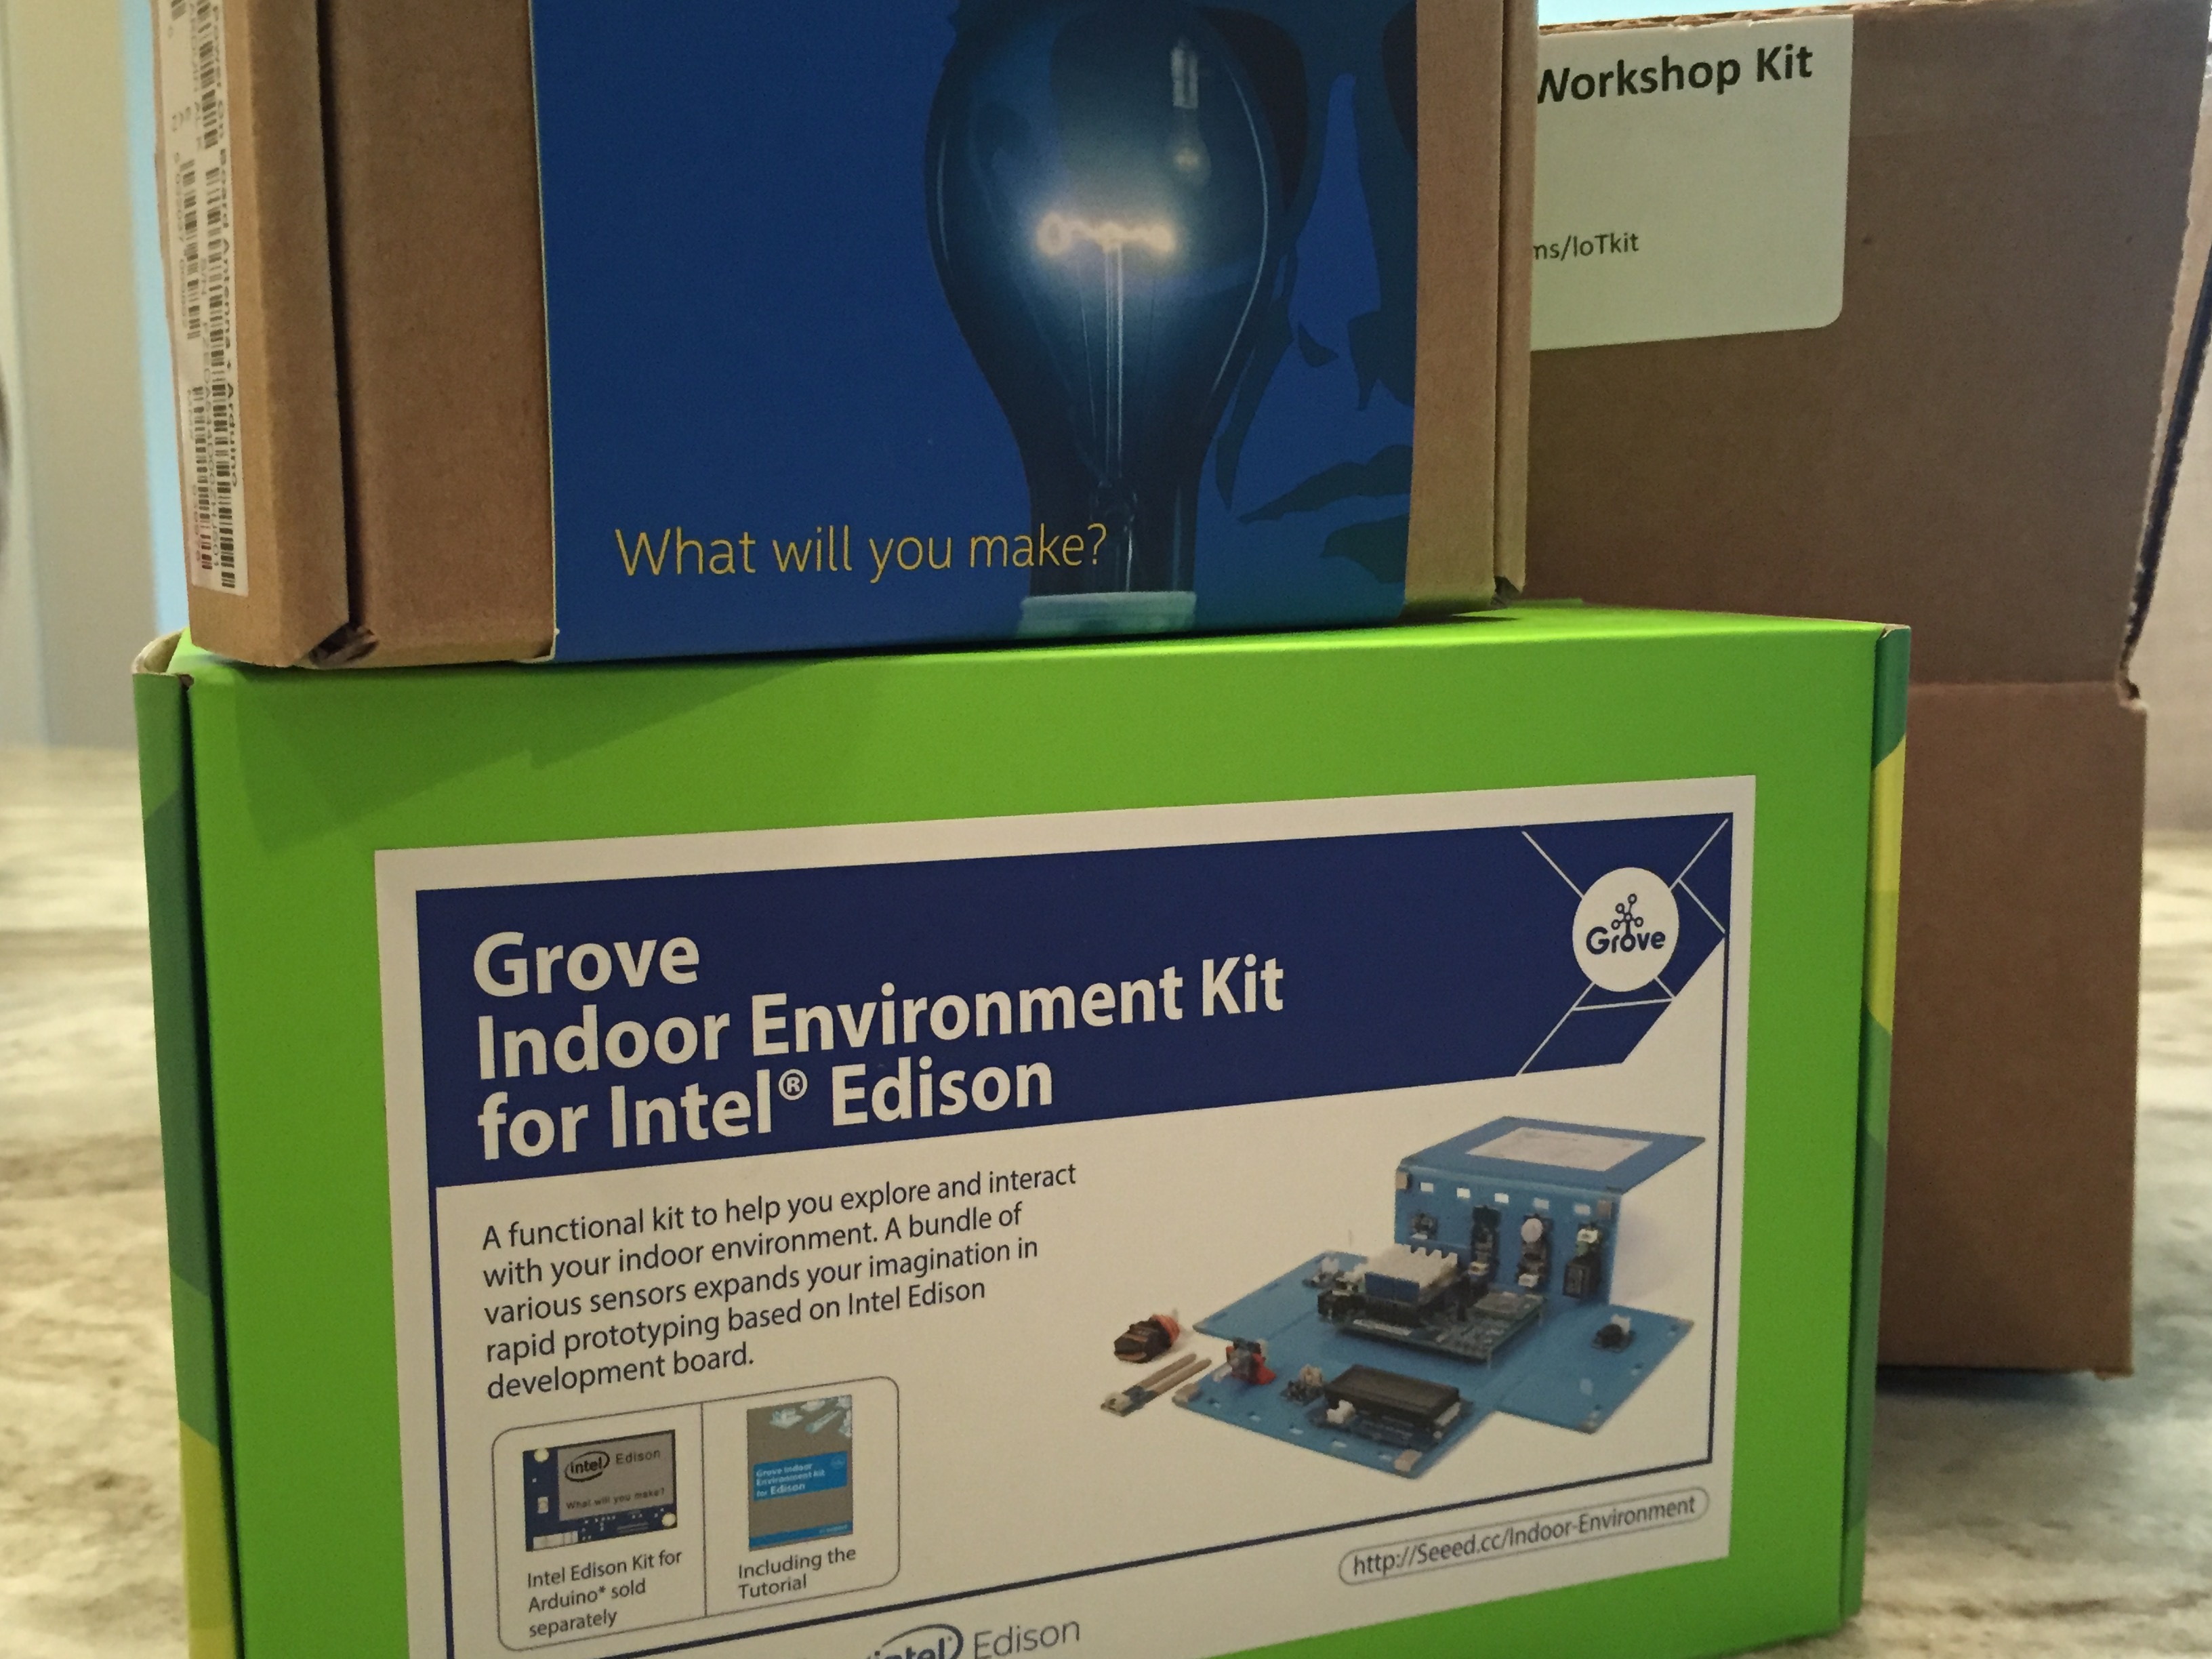
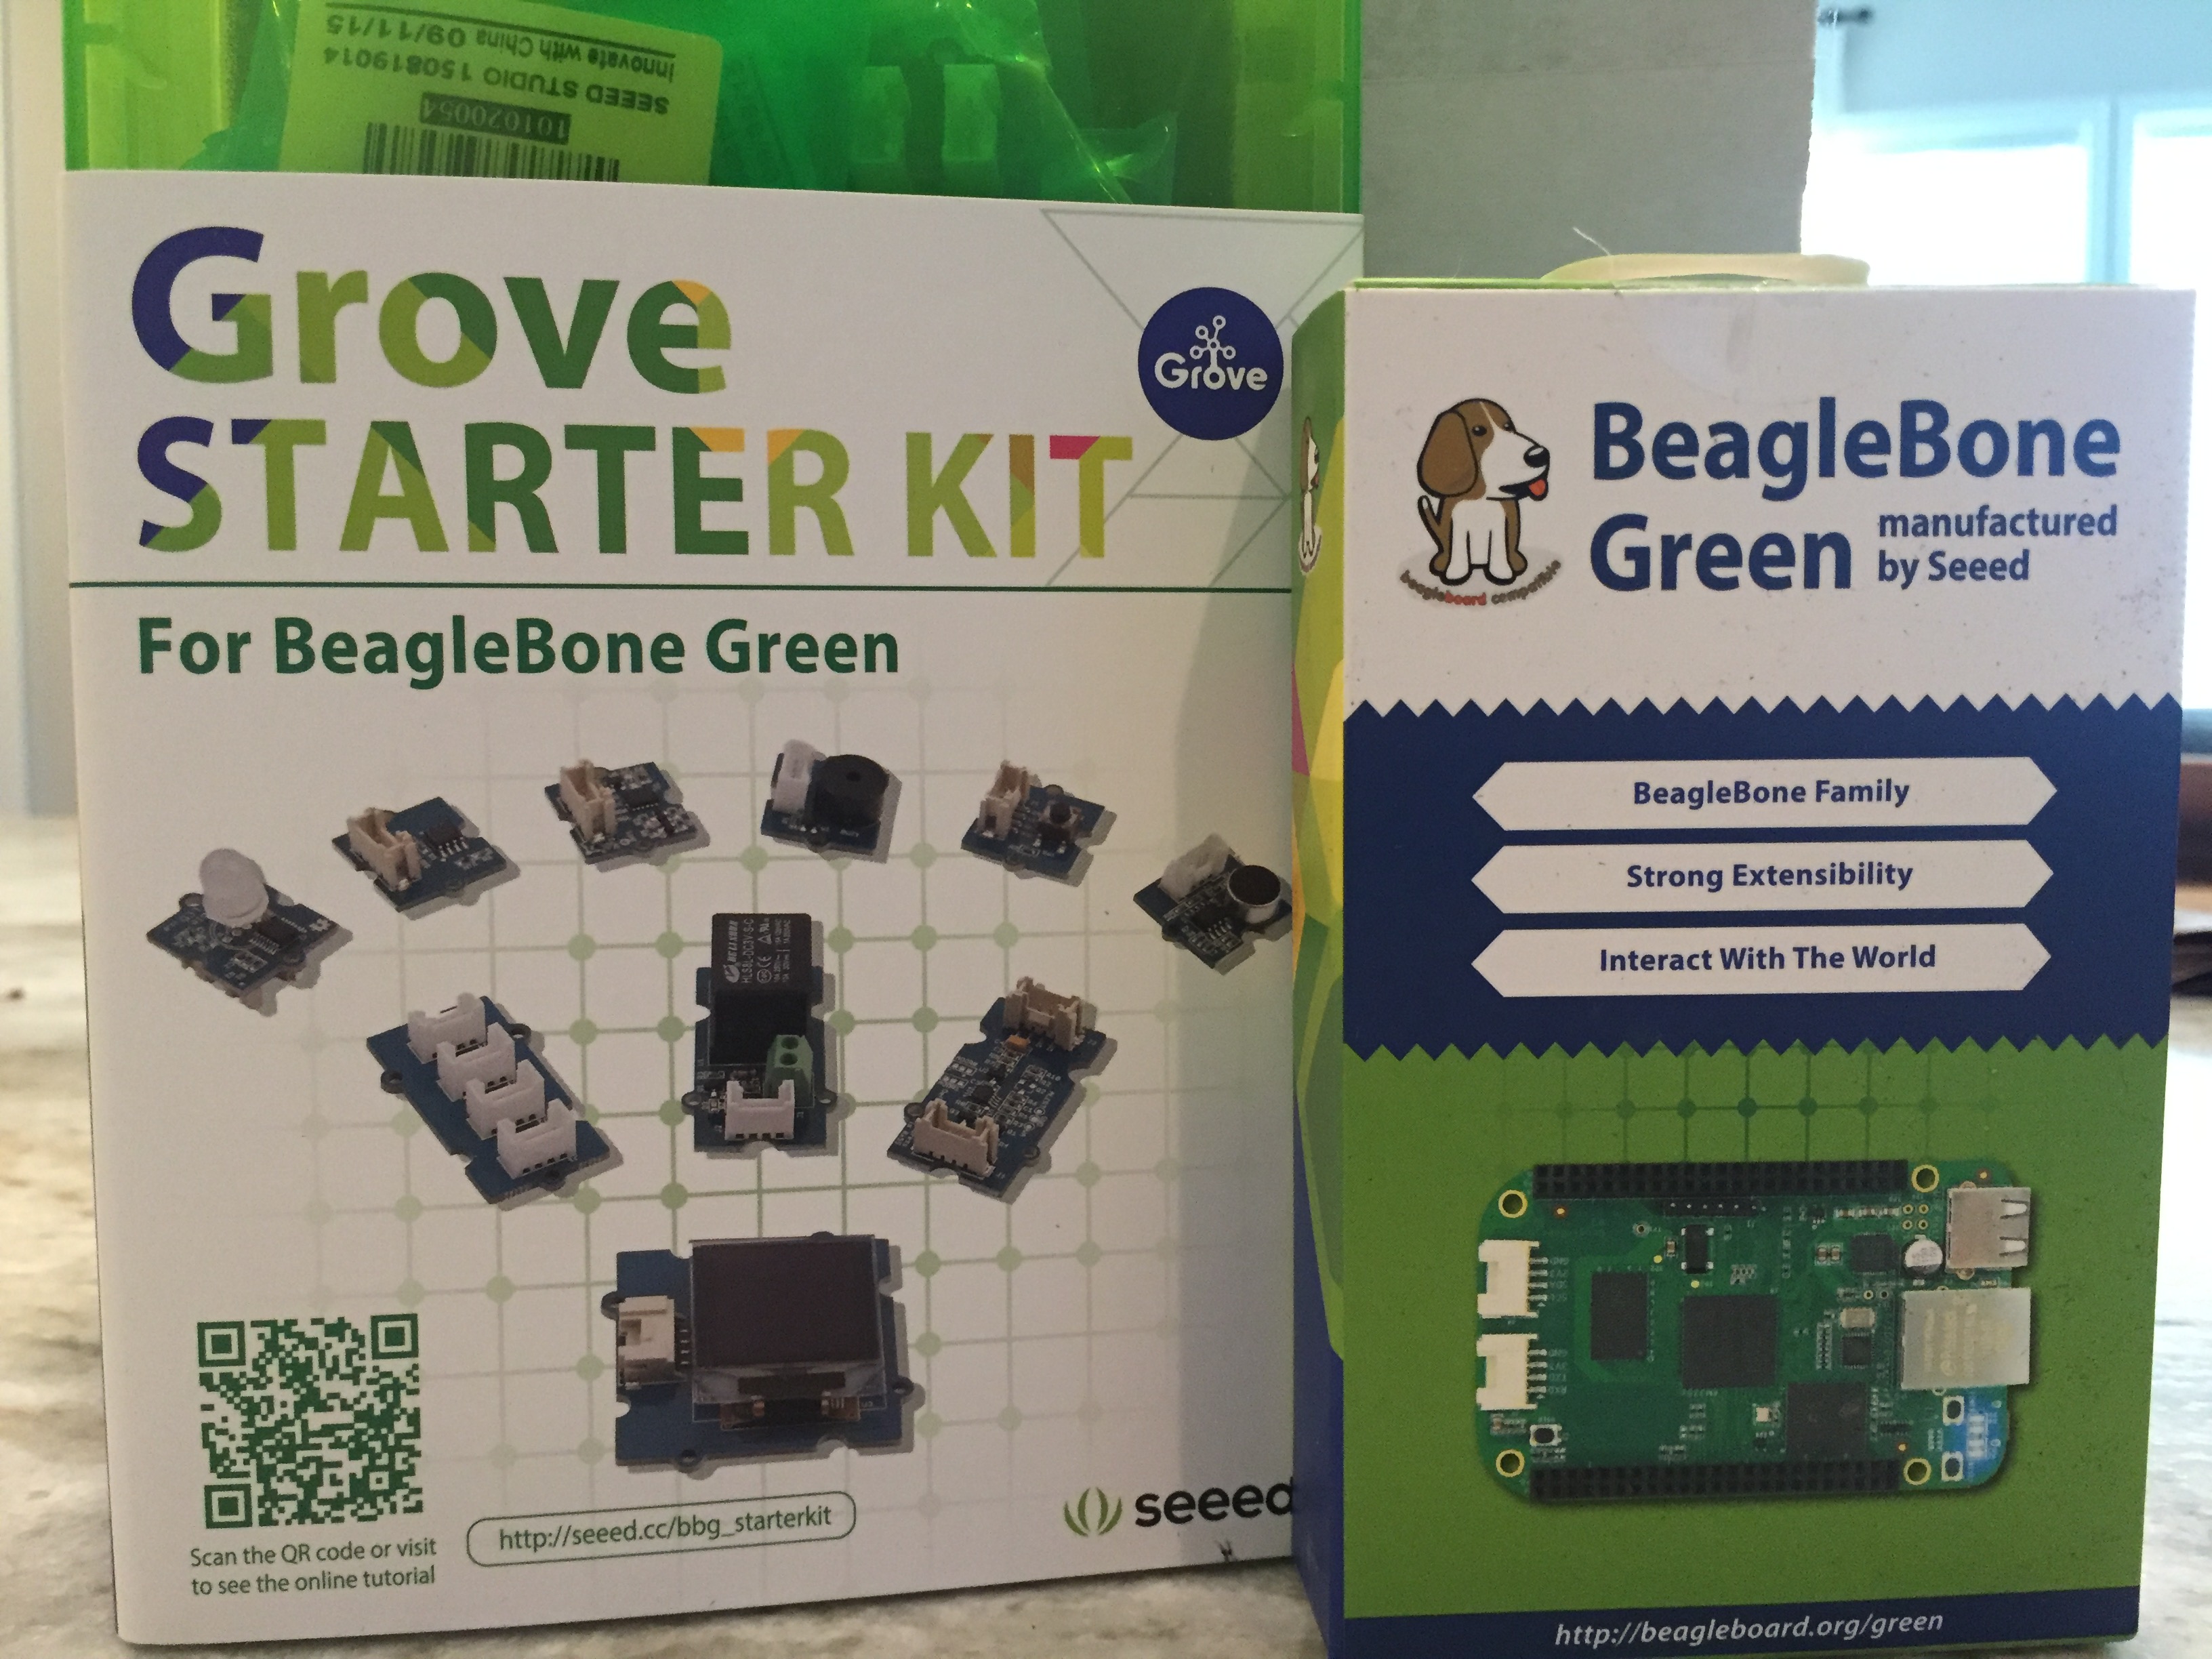
For this example I am using the Grove Stater Kit – Intel IoT Edition from  Seeed Studios, although you could use something else if you’d like. The advantage of prototyping/experimenting with the Grove kits is that they eliminate the error-prone wiring and breadboarding and make connecting a variety of sensors to digital, analog and I2C pins easy. The Grove kit includes an Arduino compatible shield that a wide variety of sensors plug into.

grove-intel

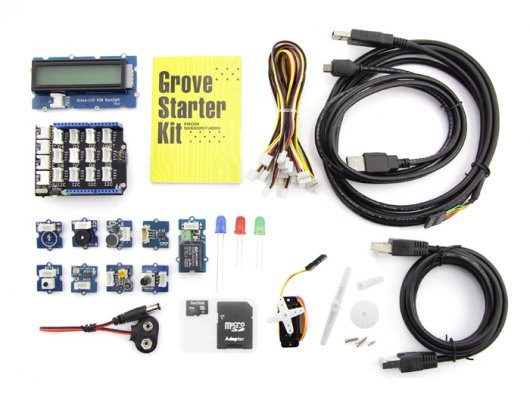
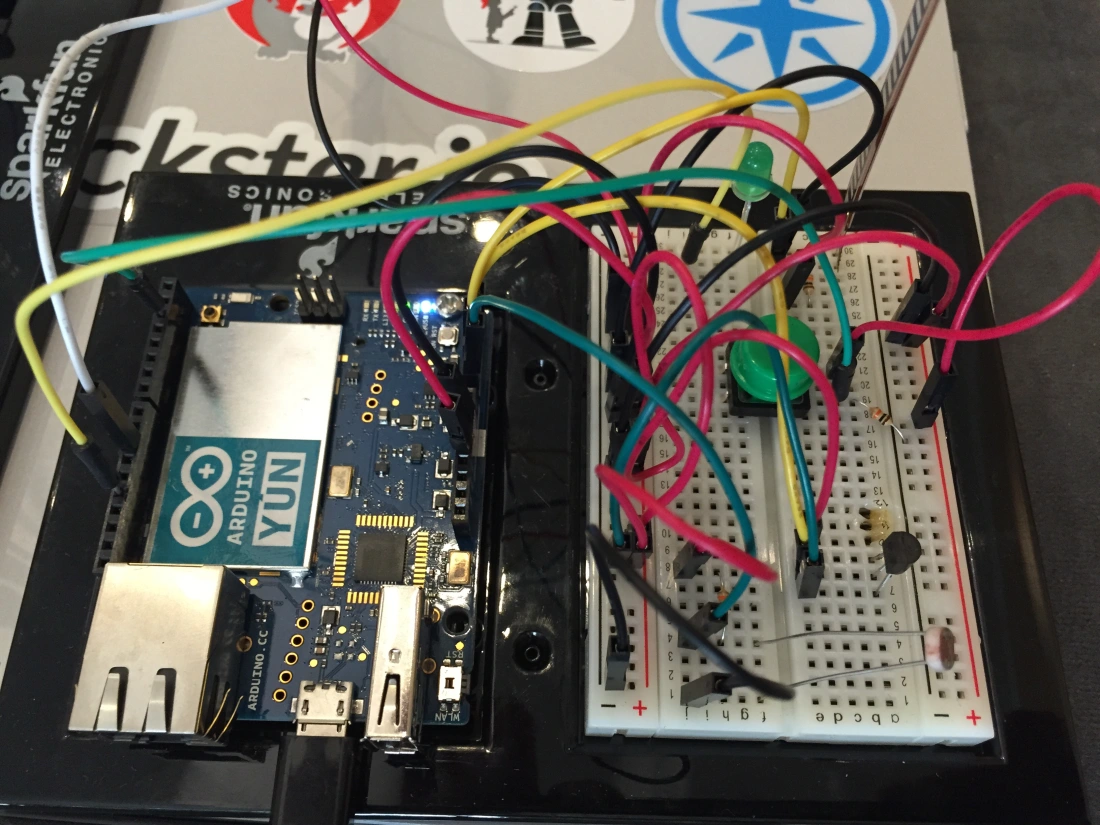
The app I built uses the Grove kit, but you can easily modify it to use sensors on a breadboard – so continue reading even if you don’t have the Grove kit.

I am also making the assumption that you have set-up and Azure IoT Hub (if you haven’t, check out this lab)

Johnny-Five

Johnny-Five is a framework I have been using a lot because of its nice abstraction of the GPIO complexities and exposes objects for the development board and sensors. The board and input sensors have events that invoke callback functions making it easy to work in an event-driven way.

Define the Application Dependencies

Start by defining the application manifest, including the dependencies. In your working directory on you PC, create a file called package.json.

{
    "name": "thinglabs-iot-sample",
    "repository": {
        "type": "git",
        "url": "https://github.com/ThingLabsIo/IoTLabs/tree/master/Edison/AzureIoT"
    },
    "version": "0.1.2",
    "private":true,
    "description": "Sample app that connects a device to Azure using Node.js",
    "main": "iot-starter-kit.js",
    "author": "Doug Seven",
    "license": "MIT",
    "dependencies": {
        "azure-iot-device": "1.0.1",
        "azure-iot-device-amqp": "1.0.1",
        "azure-iot-device-http": "1.0.1",
        "azure-iot-device-mqtt": "1.0.1",
        "johnny-five": "0.9.25",
        "edison-io": "0.9.2"
 }
}

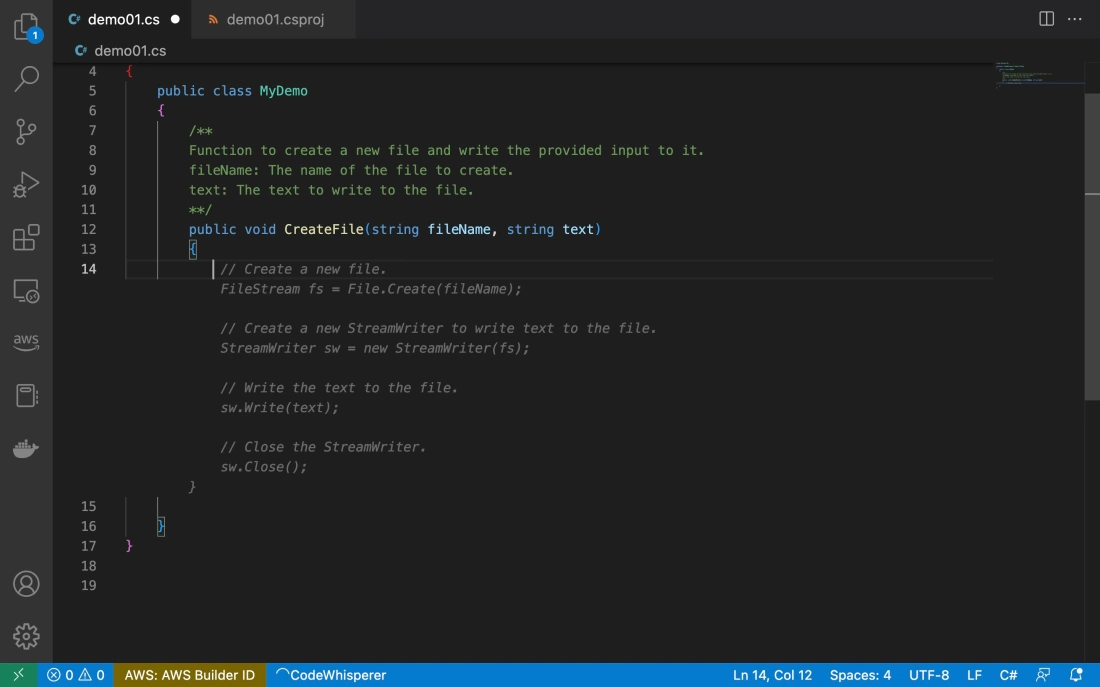
Write the Application

There are a few key concepts to cover in the application, so I have commented it verbosely. Create a new file named iot-starter-kit.js (named after the Grove kit) and add the following:

'use strict';
// Define the objects you will be working with
var five = require("johnny-five");
var Edison = require("edison-io");
var device = require('azure-iot-device');

// Define the client object that communicates with Azure IoT Hubs
var Client = require('azure-iot-device').Client;
// Define the message object that will define the message
// format going into Azure IoT Hubs
var Message = require('azure-iot-device').Message;

// Define the protocol that will be used to send messages
// to Azure IoT Hub
// For this lab we will use AMQP over Web Sockets.
// If you want to use a different protocol, comment out
// the protocol you want to replace, 
// and uncomment one of the other transports.
// var Protocol = require('azure-iot-device-amqp-ws').AmqpWs;
var Protocol = require('azure-iot-device-amqp').Amqp;
// var Protocol = require('azure-iot-device-http').Http;
// var Protocol = require('azure-iot-device-mqtt').Mqtt;

// The device-specific connection string to your Azure IoT Hub
var connectionString = '[YOUR AZURE IOT DEVICE CONNECTION STRING]';

// Create the client instance that will manage the connection
// to your IoT Hub
// The client is created in the context of an Azure IoT device.
var client = Client.fromConnectionString(connectionString, Protocol);

// Extract the Azure IoT Hub device ID from the connection string
var deviceId = device.ConnectionString.parse(connectionString).DeviceId;

// location is simply a string that you can filter on later
var location = 'Home Office';

// Define the sensors you will use.
var thermometer, lcd, led;

// Define some variable for holding sensor values
// celsius, fahrenheit, red, green, blue
// and initialize them all to 0
var c, f, r, g, b = 0;

// Define the board, which is an abstraction of the Intel Edison
var board = new five.Board({
 io: new Edison()
});

// Open the connection to Azure IoT Hub
// When the connection respondes (either open or error)
// the anonymous function is executed
var connectCallback = function (err) {
  console.log("Azure IoT connection open...");
 
  if(err) {
    // If there is a connection error, show it
    console.err('Could not connect: ' + err.message);
  } else {
    console.log('Client connected');
 
    // Create a message and send it to the IoT Hub every five-seconds
    var sendInterval = setInterval(function () {
      sendMessage('temperature', c);
    }, 5000);
 
    client.on('message', function (msg) {
      console.log('Id: ' + msg.messageId + ' Body: ' + msg.data);
 
      var body = msg.data.split(":");
      var indexOfLed = body.indexOf("led");
 
      if(indexOfLed >= 0) {
        if(body[indexOfLed+1] === "on"){
          led.on();
        } else if(body[indexOfLed+1] === "off"){
          led.off();
        }
      }
 
      client.complete(msg, printResultFor('completed'));
      // reject and abandon follow the same pattern.
      // /!\ reject and abandon are not available with MQTT
    });
 
    // If the client gets an error, handle it
    client.on('error', function (err) {
      console.error(err.message);
    });
 
    // If the client gets disconnected, cleanup and reconnect
    client.on('disconnect', function () {
      clearInterval(sendInterval);
      client.removeAllListeners();
      client.connect(connectCallback);
    });
  }
}  

function sendMessage(src, val){
  // Define the message body
  var payload = JSON.stringify({
    deviceId: deviceId,
    location: location,
    sensorType: src,
    sensorValue: val
  });
 
  // Create the message based on the payload JSON
  var message = new Message(payload);
 
  // For debugging purposes, write out the message payload to the console
  console.log("Sending message: " + message.getData());
 
  // Send the message to Azure IoT Hub
  client.sendEvent(message, printResultFor('send'));
}
 
// Helper function to print results in the console
function printResultFor(op) {
  return function printResult(err, res) {
    if (err) console.log(op + ' error: ' + err.toString());
    if (res) console.log(op + ' status: ' + res.constructor.name);
  };
}

// Linear Interpolation
// https://en.wikipedia.org/wiki/Linear_interpolation
function linear(start, end, step, steps) {
  return (end - start) * step / steps + start;
}

// The board.on() executes the anonymous function when the 
// board reports back that it is initialized and ready.
board.on("ready", function() {
  console.log("Board connected...");
 
  client.open(connectCallback);
 
  // Plug the Temperature sensor module
  // into the Grove Shield's A0 jack
  thermometer = new five.Thermometer({
    pin: "A0",
    controller: "GROVE"
  });
 
  // Plug the LCD module into any of the
  // Grove Shield's I2C jacks.
  lcd = new five.LCD({
    controller: "JHD1313M1"
  });
 
  // Plug the LED module into the Grove Shield's D6 jack
  led = new five.Led(6);
 
  // The thermometer object will invoke a callback everytime it reads data
  // as fast as every 25ms or whatever the 'freq' argument is set to
  thermometer.on("data", function() {
    /* 
     * The LCD's background will change color according to the temperature.
     * Hot -> Warm: Red -> Yellow
     * Moderate: Green
     * Cool -> Cold: Blue -> Violet
     */
 
    // If there is no change in temp, do nothing.
    if (f === Math.round(this.fahrenheit)) {
      return;
    }
 
    f = Math.round(this.fahrenheit);
    c = Math.round(this.celsius);
 
    r = linear(0x00, 0xFF, f, 100);
    g = linear(0x00, 0x00, f, 100);
    b = linear(0xFF, 0x00, f, 100);
 
    lcd.bgColor(r, g, b).cursor(0, 0).print("Fahrenheit: " + f);
  });
});

Copy App Files to Edison

Using FileZilla you can connect to the Edison using sftp and drag-n-drop files onto the Edison.

  1. Launch FileZilla and connect to the Edison:
    Host: The IP address of the Edison
    Username: root
    Password: edison
    Port: 22
  2. Press Quickconnect
  3. Set the Local site path to the directory where your app files are located.
  4. Under the root directory on the Edison (Remote site), create a new directory named iot-labs.
  5. Drag the application files from the Local site directory to the Remote site directory.

Run the Application

From the terminal session, move to the iot-labs directory.

cd iot-labs

Use NPM to install the application dependencies.

npm install

Run the application

node iot-starter-kit.js

The application will launch and you will see some initial messages as the board initializes. After a few seconds you should see the temperature displayed on the LCD screen, and every five seconds you should see a messaged sent (‘enqueued’) to your Azure IoT hub.

root@ubilinux:~/iot-labs/azure-iot# node iot-starter-kit.js 
1456213504410 Device(s) Intel Edison 
1456213504440 Connected Intel Edison 
1456213504469 Repl Initialized 
>> Board connected...
Azure IoT connection open...
Client connected
Sending message: {"deviceId":"d7-edison","location":"Home Office","sensorType":"temperature","sensorValue":24}
send status: MessageEnqueued
Sending message: {"deviceId":"d7-edison","location":"Home Office","sensorType":"temperature","sensorValue":24}
send status: MessageEnqueued

You can monitor the messages coming into Azure IoT Hubs by using the iothub-explorer command line utility. In a new terminal window, install the iothub-explorer with NPM.

npm -g install iothub-explorer

Once installed, turn on the iothub-explorer event monitor (this will monitor messages as they come into your Azure IoT hub – so you know they are getting there).

iothub-explorer [YOUR IOT HUB OWNER CONNECTION STRING] monitor-events [YOUR DEVICE ID]

Note: On Mac OS X put the connection string in quotes. On Windows, do not use quotes).

You should see the same messages that your Edison is sending showing up in the monitor.

Event received: 
{ deviceId: 'd7-edison',
 location: 'Home Office',
 sensorType: 'temperature',
 sensorValue: 24 }

Sending Cloud to Device Messages

One of the capabilities I slipped into the application without much fanfare is the ability for the Edison to run an LED on and off based on messages sent to it via the Azure IoT hub. You can look at the application code for this block:

client.on('message', function (msg) {
  console.log('Id: ' + msg.messageId + ' Body: ' + msg.data);
 
  var body = msg.data.split(":");
  var indexOfLed = body.indexOf("led");
 
  if(indexOfLed >= 0) {
    if(body[indexOfLed+1] === "on"){
      led.on();
    } else if(body[indexOfLed+1] === "off"){
      led.off();
    }
  }
 
  client.complete(msg, printResultFor('completed'));
  // reject and abandon follow the same pattern.
  // /!\ reject and abandon are not available with MQTT
});

This block listens for incoming messages over AMQP and evaluates them for the sting led in the body of the message. If led is found, and the very next item in the body (split on a semicolon) is the word on or off, then the LED state is changed respectively (this is a simple/crude example of how to do this).

You can send messages to the Edison from the iothub-explorer with the following command:

iothub-explorer [YOUR IOT HUB OWNER CONNECTION STRING] send [YOUR DEVICE ID] led:on

Try it a few times using led:on and led:off as the message body.

There you have it. You can now use Node.js on the Intel Edison to send Device-to-Cloud messages and receive Cloud-to-Device messages (which can be command messages).
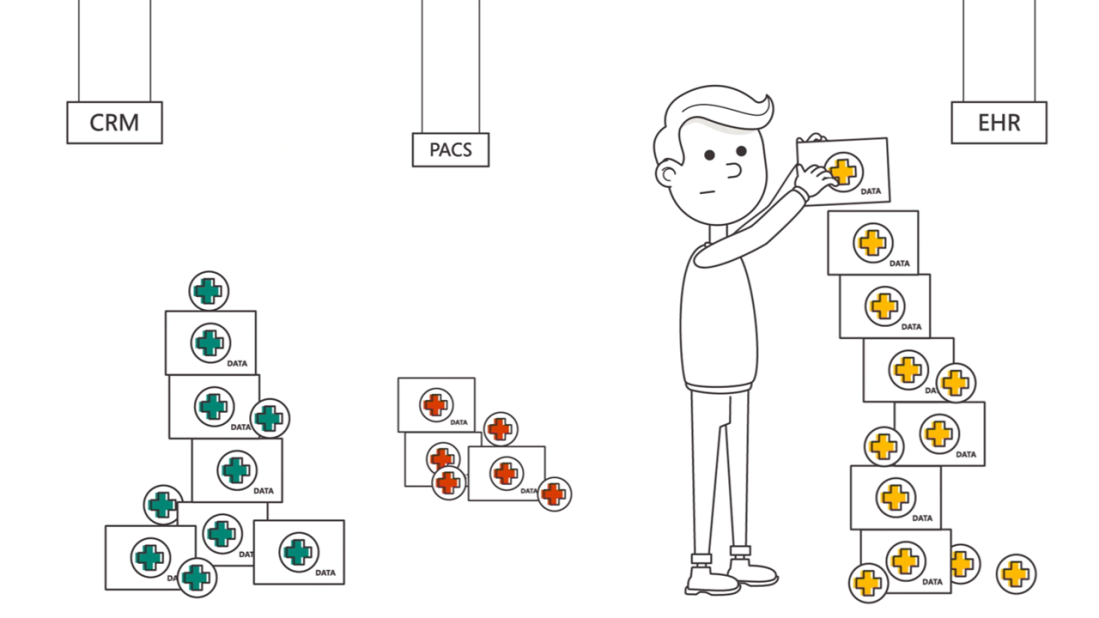
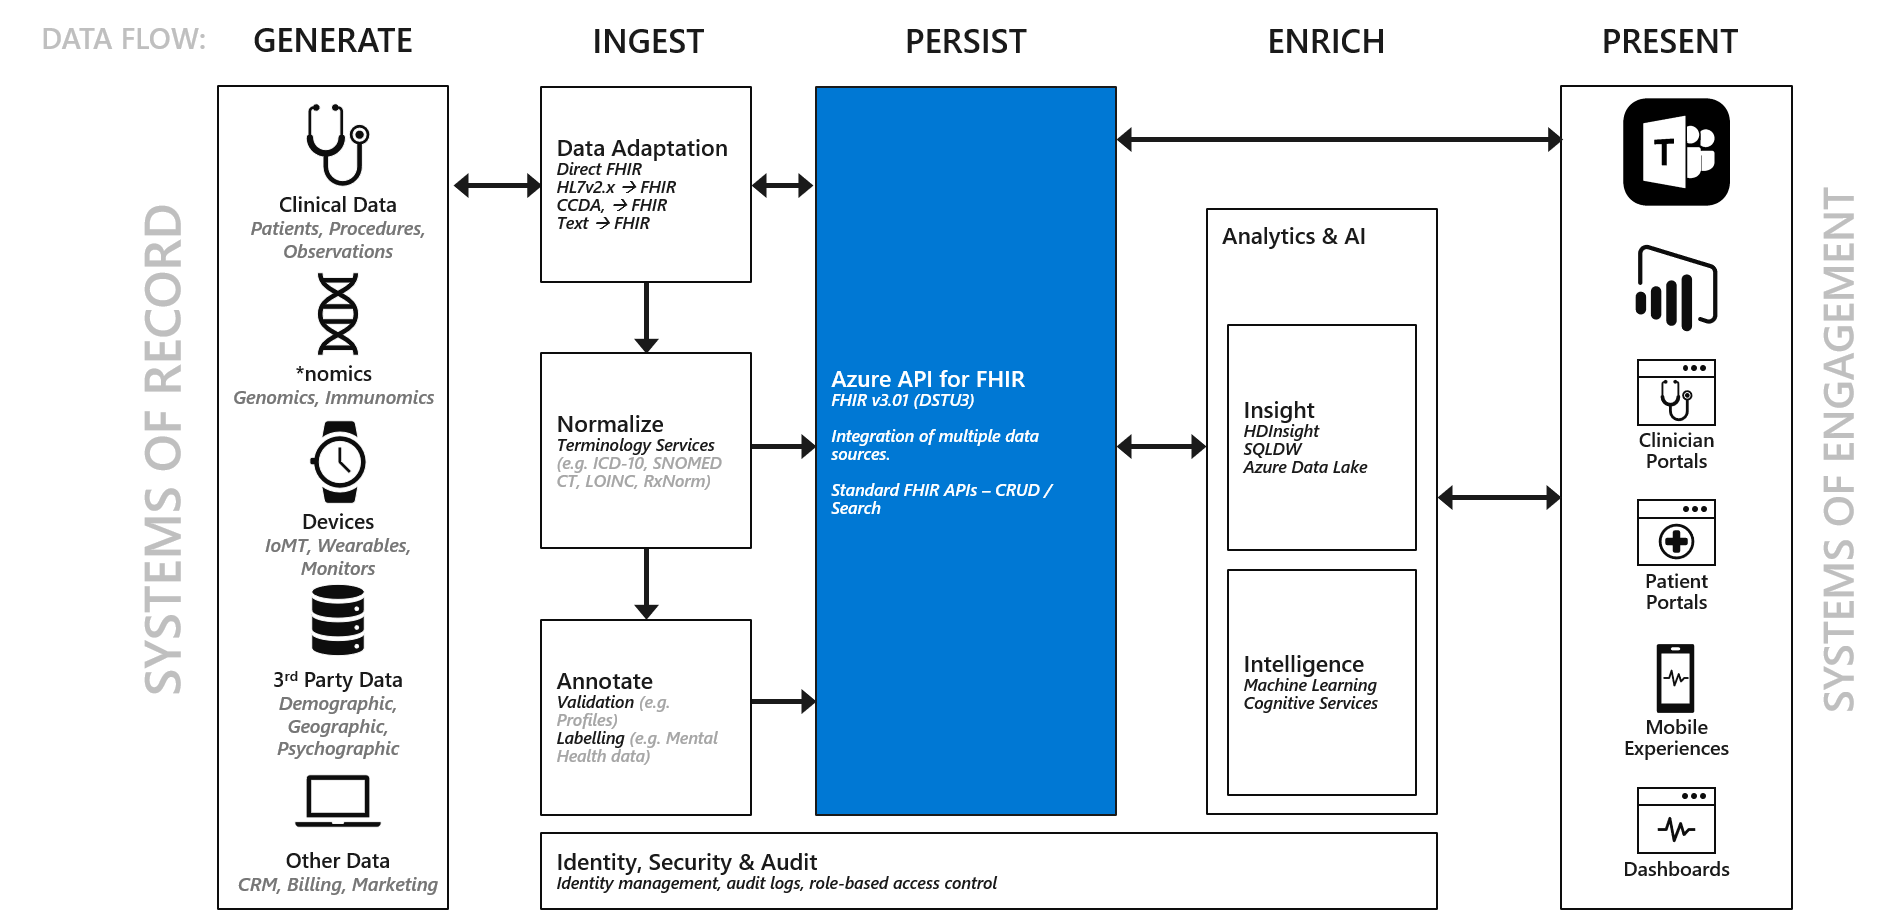
 

ThingLabs.io IoT Hands-on Workshop – April 18, 2016 – Florida

Register now for the ThingLabs.io Hands-on Workshop at DEVintersection in Orlando, Florida.

Use discount code SEVEN

April 18, 206 – Walt Disney World Swan Resort 

The Internet of Things (IoT) is the latest in an ever growing realm of technology that modern developers have to know about. To get into the IoT you have to learn about small form-factor and low-energy devices that interact with the physical world, and you have to know the Cloud services that will interface with these devices, for both data ingestion and command and control. In this full-day workshop you will learn both sides of the IoT. You will begin by diving into the world of Things by building applications that run on the Raspberry Pi 2, running Windows 10 IoT Core – a small form-factor variant of the popular Windows 10 family. Once you have mastered the wold of Windows 10 IoT Core, you will learn how to connect the Thing you built to Azure IoT Hubs – a new Azure service designed to support millions of devices sending millions of messages. You will build an data ingestion pipeline, including visualizations of your IoT data that enable you to gain insight into your solution, and a command capability that enables you to control your device remotely. By the end of the workshop you will have built a complete Windows and Azure IoT solution – and you may keep the hardware kit to continue your adventure in IoT.

This is a hands-on workshop. You must bring your own Windows 10 laptop with Visual Studio 2015 Community (or higher edition) installed.

Building the Internet of Things with Doug Seven

c9-01Richard Campbell from DEVintersection chats with Doug Seven about his IoT workshops, engaging with developers to see just how small computers can be made now, and how you can create a network of ultra-small devices to work together to provide a huge amount of data about the world around you. Using development tools, languages and platforms you know today, you too can get building the Internet of Things! Doug will be leading workshops at DEVintersection in Amsterdam Oct 14-16 and also in Las Vegas at the MGM Grand Oct 26-29. Sign up today!